
 Adobe last night released cloud-based Lightroom desktop app version 3.3 for Windows and Mac, and Lightroom Mobile 5.3 for iOS and Android. These updates contain lots of new features, support for new cameras, new lens profiles, and bug fixes.
Lightroom Classic 9.3 was also released – read about it in my Classic article.
In This Article:
(These links above to sections below may or may not work depending on what device and system you are using. If they don’t, then scroll down.)
New Logos
How and When to Update
New Cameras Now Supported
New Lens Profiles
Share Your Edits with the Community
Monitor Comment and Like Activity
Local Hue
Versions
Watermarking
Raw Defaults
Lightroom to Photoshop on iPad
Related Posts
New Lightroom Logos
As part of a larger rollout to update its brand identity, Adobe has introduced new logos for the cloud-based Lightroom and for Lightroom Classic:

Cloud-Based Lightroom Old and New Logos
Lightroom Classic Old and New Logos
The Creative Cloud logo has also been updated:

Old and New Creative Cloud Logos
How and When to Update
When to Update Lightroom Desktop (if Lightroom didn’t auto-update):
I don’t expect any issues with Lightroom 3.3 and updates of this app usually go smoothly, but if you’re not in a hurry to get the new features, it can’t hurt to wait a week or so to make sure that others aren’t experiencing serious bugs with it.
If I hear of serious issues with this release I will post them here in this section – please check here rather than emailing me.
Click here to check for bug reports and to report bugs or issues that you encounter.
How to Update the Lightroom Desktop App
If you previously were prompted to agree to auto-update Lightroom and if you agreed, then when you open Lightroom for the first time after the update is available, go to Help>System Info to verify that you are now using version 3.3. Otherwise to update to 3.3, go to Help>Updates, and in the Creative Cloud app, on the Updates tab click on Update next to Lightroom (cloud-based photo service; not Lightroom Classic or Lightroom CC 2015.)
How to Update Lightroom Mobile
Find the Lightroom app in the Apple App Store or Google Play Store and tap on Update.
New Cameras Now Supported
The entire Lightroom ecosystem now support the following new cameras:
- Apple iPad Pro (11-inch) (2nd generation)
- Apple iPad Pro (12.9-inch) (4th generation)
- Apple iPhone SE (2020 version)
Click here for a list of all cameras supported by each version of Lightroom (and Camera Raw).
New Lens Profiles
These new lens profiles are available throughout the Lightroom ecosystem:
Share Your Edits with the Community
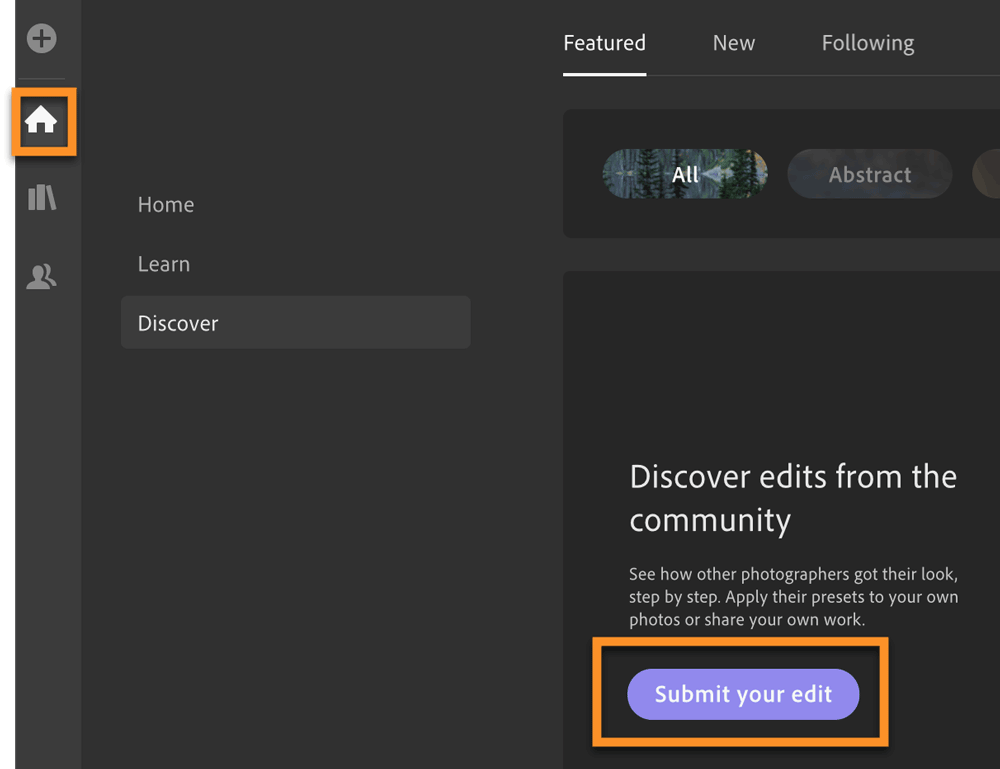
If you’ve enjoyed the Learn and Discover section (as I have!!) and wondered when you can share your own edited photos with the Lightroom community so they can move step-by-step through your edits, and if you choose, download a preset of your edits – the answer is now!
Your shares will become Discover posts. To get started, in Lightroom desktop, go to the Learn tab and click on Submit Your Edit – you will be guided through quick and easy process. .
Or, just select a photo in your library, click on Share, choose Share Edit (Beta)…, type in the requested information and click on Share.

To share from Lightroom Mobile, tap on the Share icon and choose Share Edit (Beta).
Do read the Community Guidelines before submitting.
You can also now follow your favorite photographers who have posted Learn and Discover posts!
Monitor Comment and Like Activity
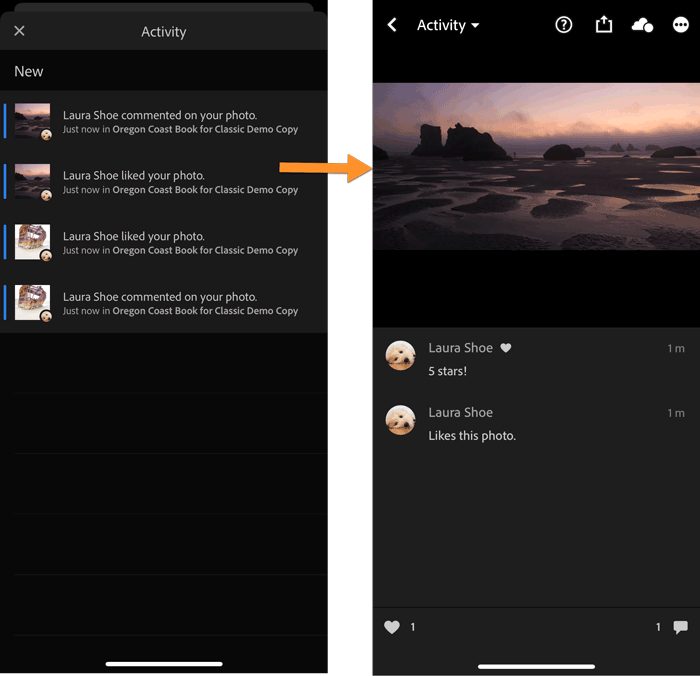
Now monitor comments and likes in Lightroom Desktop and Mobile. Click/tap on the bell icon in the top right to open the Activity panel, and you’ll see a summary of activity; tap on an individual entry to see activity details.
Local Hue
Now change colors within a local area in your image with the new Hue slider, available in the brush, linear gradient and radial gradient:
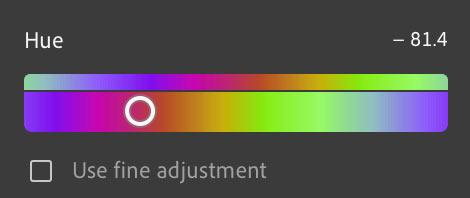
Paint a local area with the brush or one of the local filters. Then drag from the circular handle on the Hue slider to shift all colors within the area you’ve defined. The bottom hue bar represents Before, and the top, After. In the screenshot above, pink is shifted to blue, blue to green, green to red/orange.

Local hue change in the doll clothes, painted carefully (with Auto Mask on when useful)
This Hue slider is actually more powerful than the global hue sliders, as it gives you 360 degrees of change around the color wheel – you can change a color to any other color. The global sliders only allow much narrower changes – for example, from red to orange and purple, rather than all the way to green and blue.
Combine local Hue with local Exposure and Saturation to affect hue, saturation and luminance of of colors. Paint one color carefully (use Auto Mask to protect against spilling outside of edge) to limit changes to one specific color. (Unfortunately the cloud-based Lightroom doesn’t have Range Mask, which makes it easy to restrict local changes to particular colors.)
Versions
With the new Versions panel, save different versions of your photos with different edits.
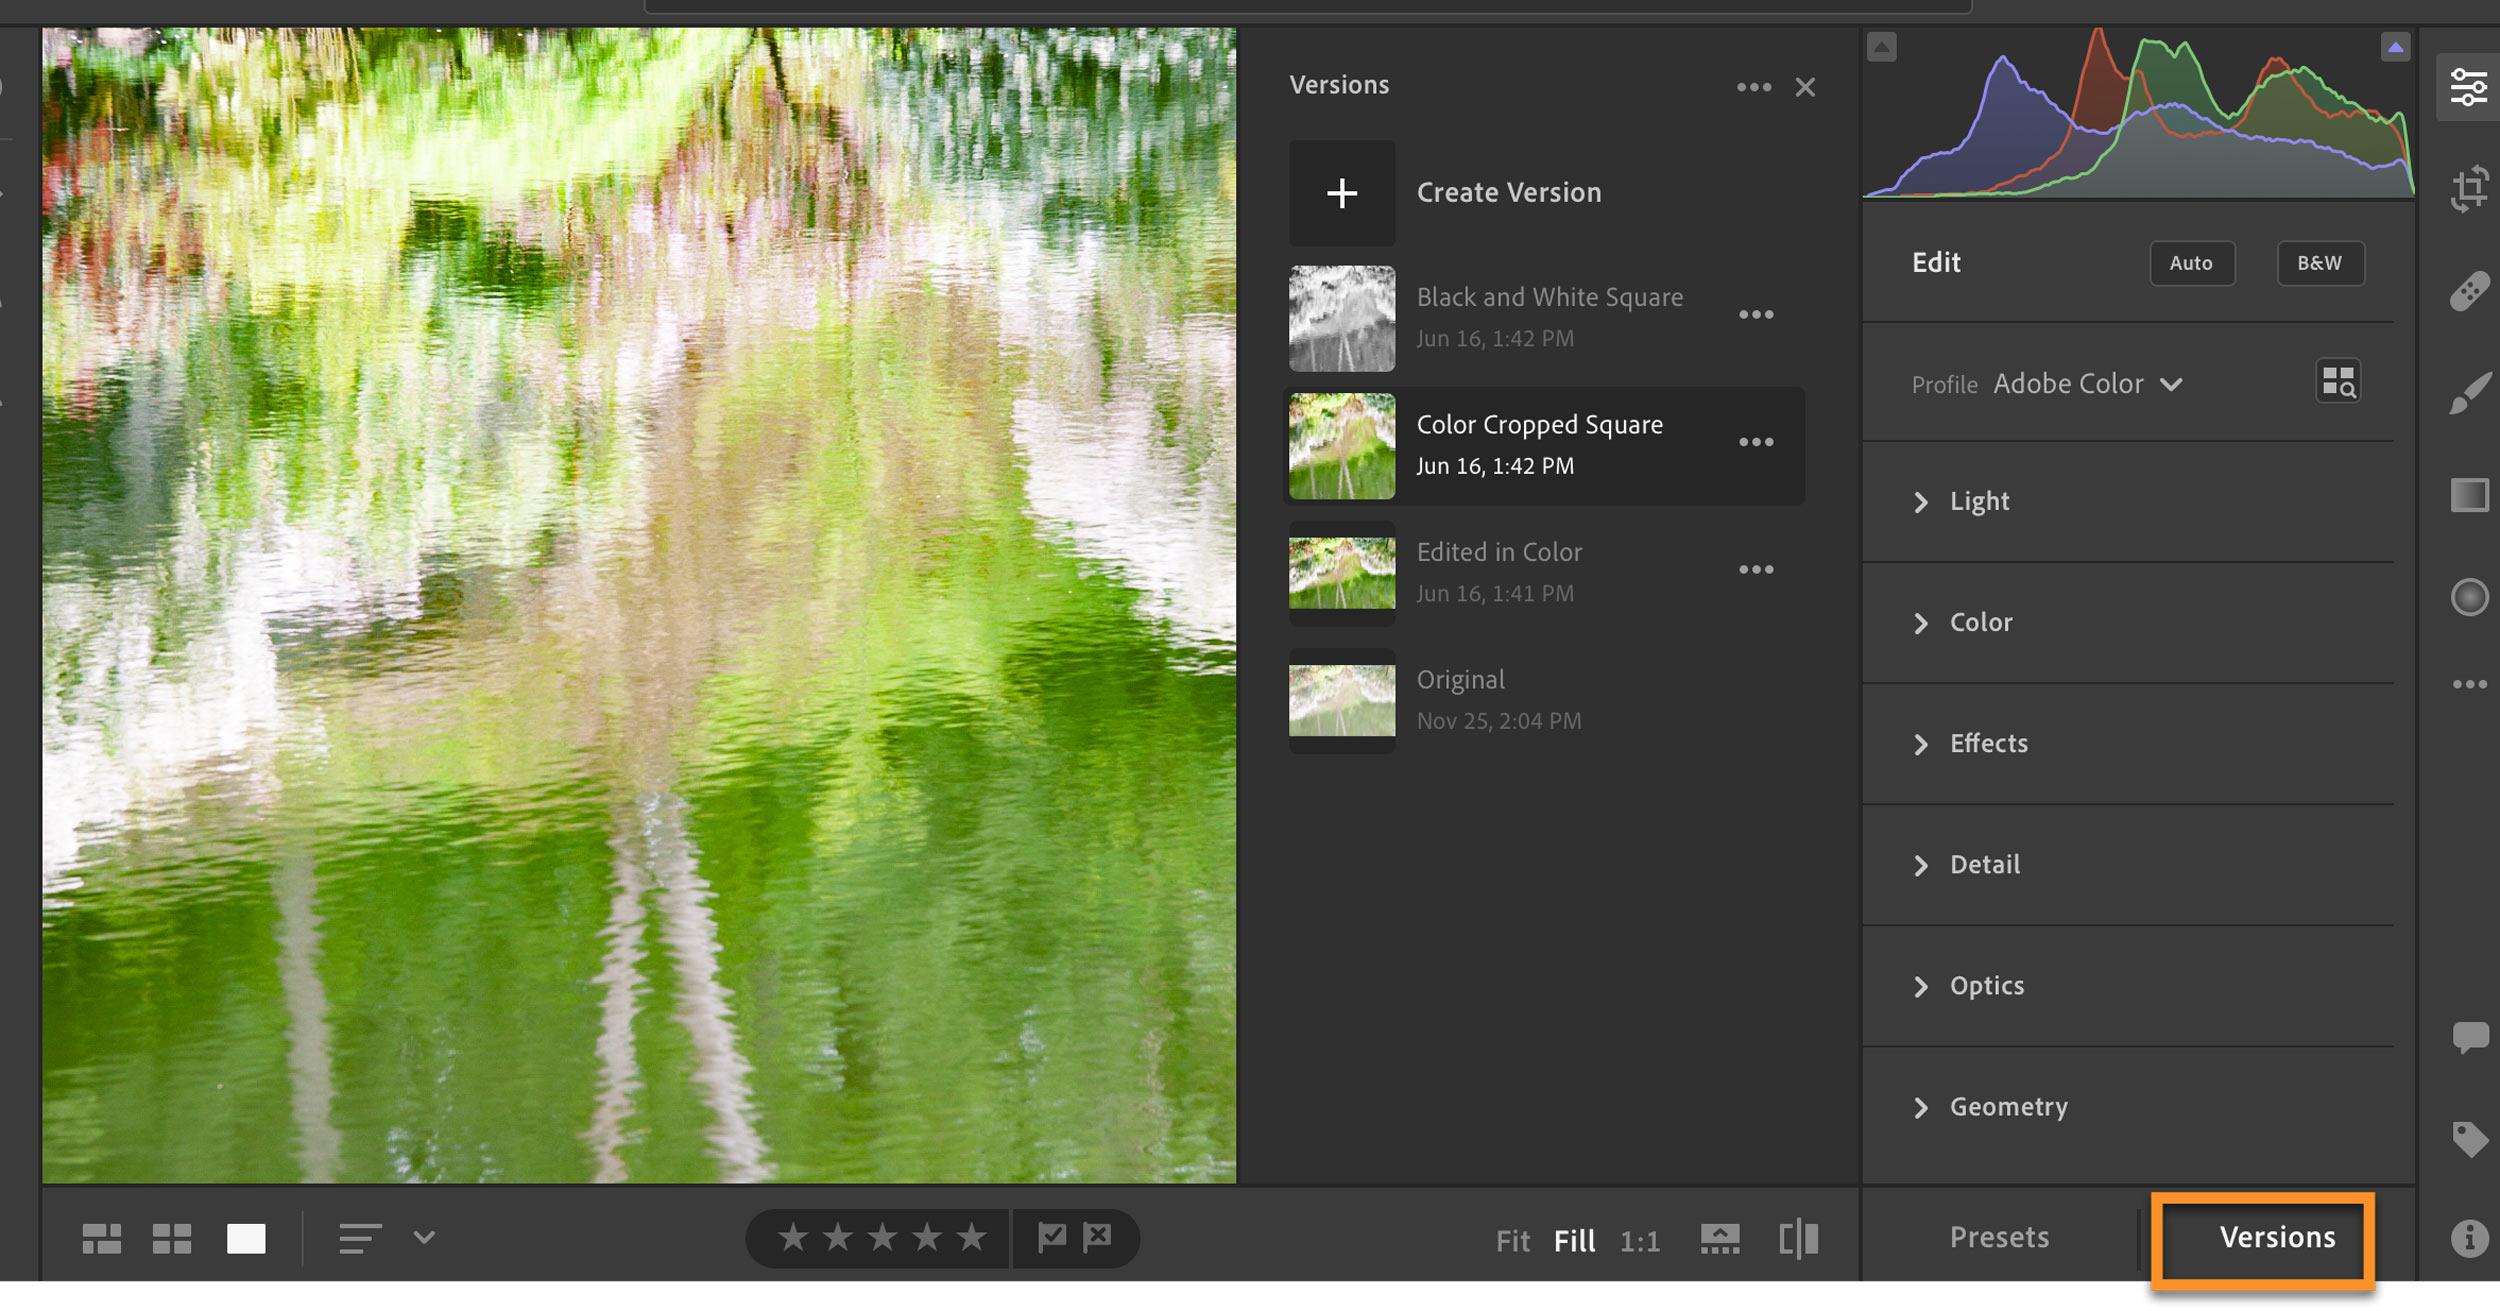
Versions sync to all your devices and don’t take up cloud storage space. (They’re like snapshots in Lightroom Classic, though they can’t be updated with new settings (delete the old one, save the new one).
To access and create versions in Lightroom Mobile, go to the Versions tab (last tab to the right, past all the edit settings).
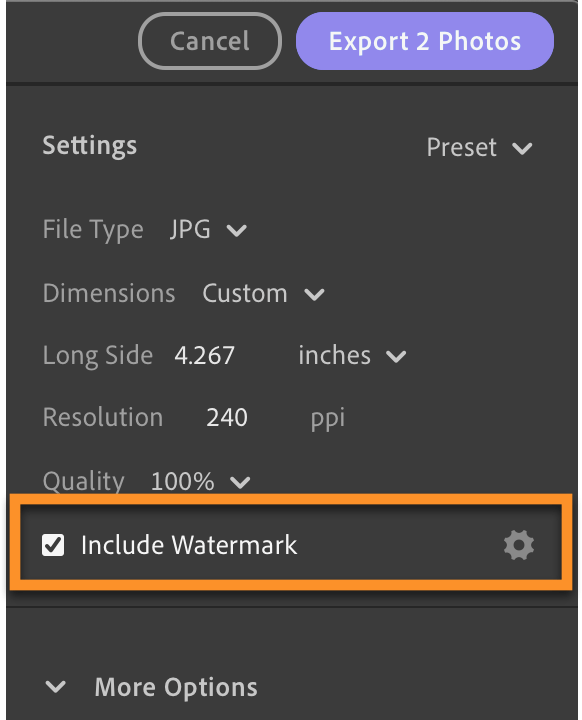
Watermark Your Exported Images
Design your text watermark in Lightroom on your Desktop or in Lightroom Mobile iOS or Android, and have it sync to your other devices.
Lightroom Desktop
Select one or more images, then click on the Share icon, then Export… Turn on Include Watermark, then click on the Settings (gear) symbol to customize.

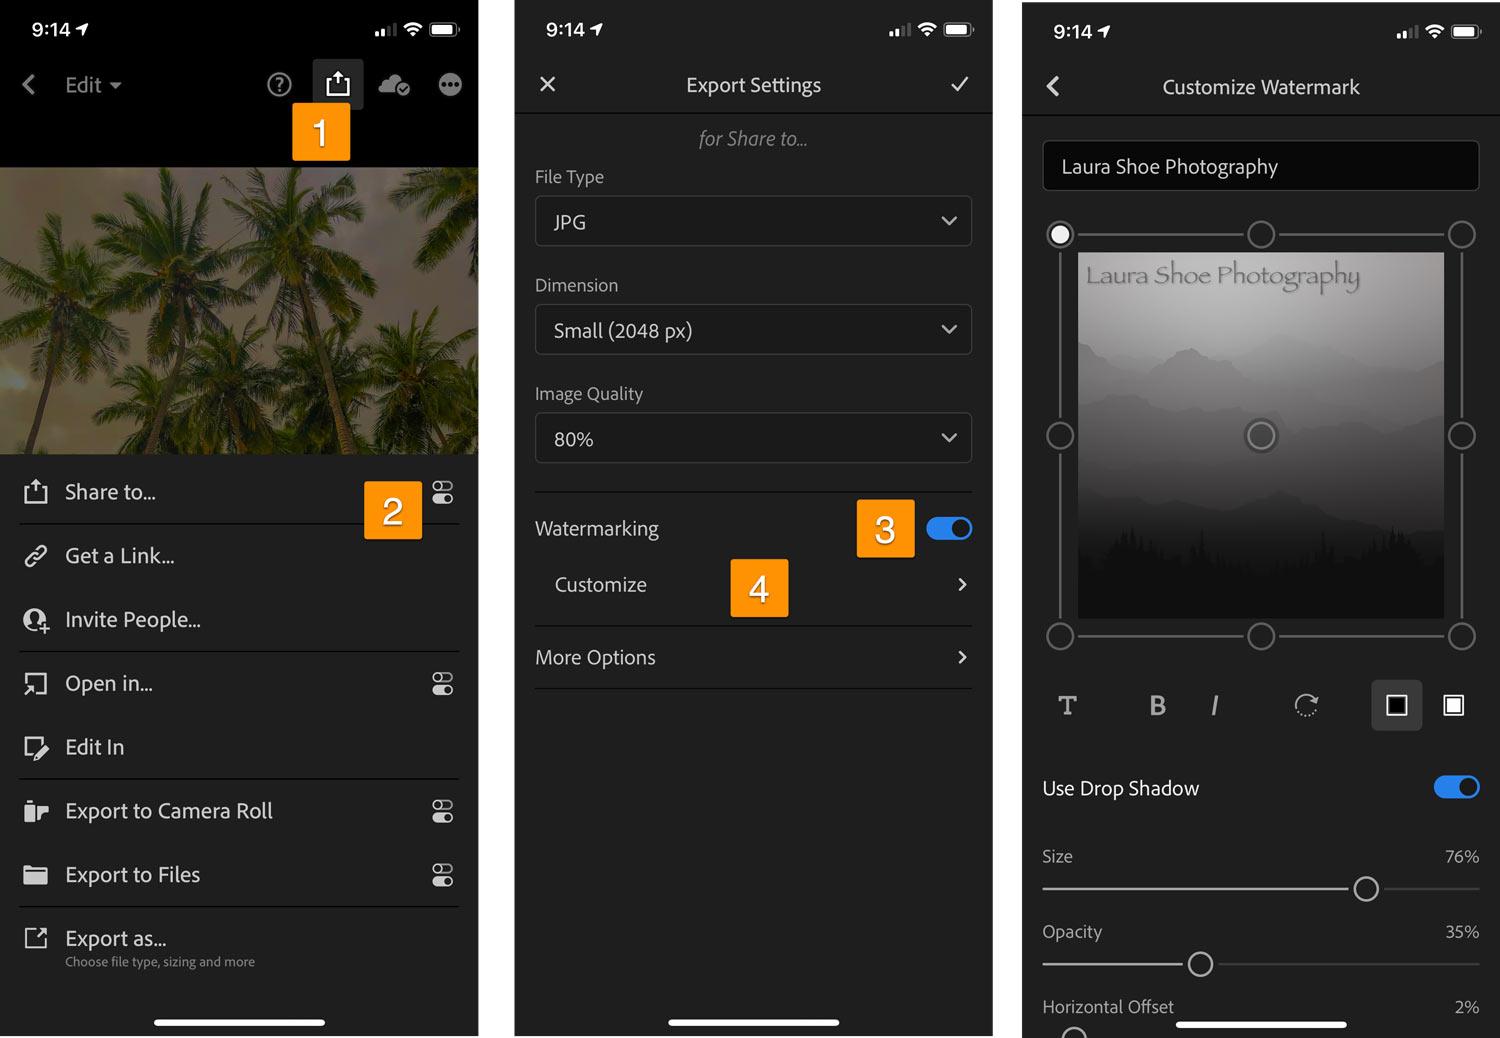
Lightroom Mobile
Watermarking in Lightroom Mobile now has more options. A watermark made in one client syncs to the other.
Raw File Defaults
When raw files are imported, they are assigned Adobe default edits – 0 for most sliders, a certain amount of noise reduction and sharpening, etc. You can now change the defaults, in Preferences on the Import tab:
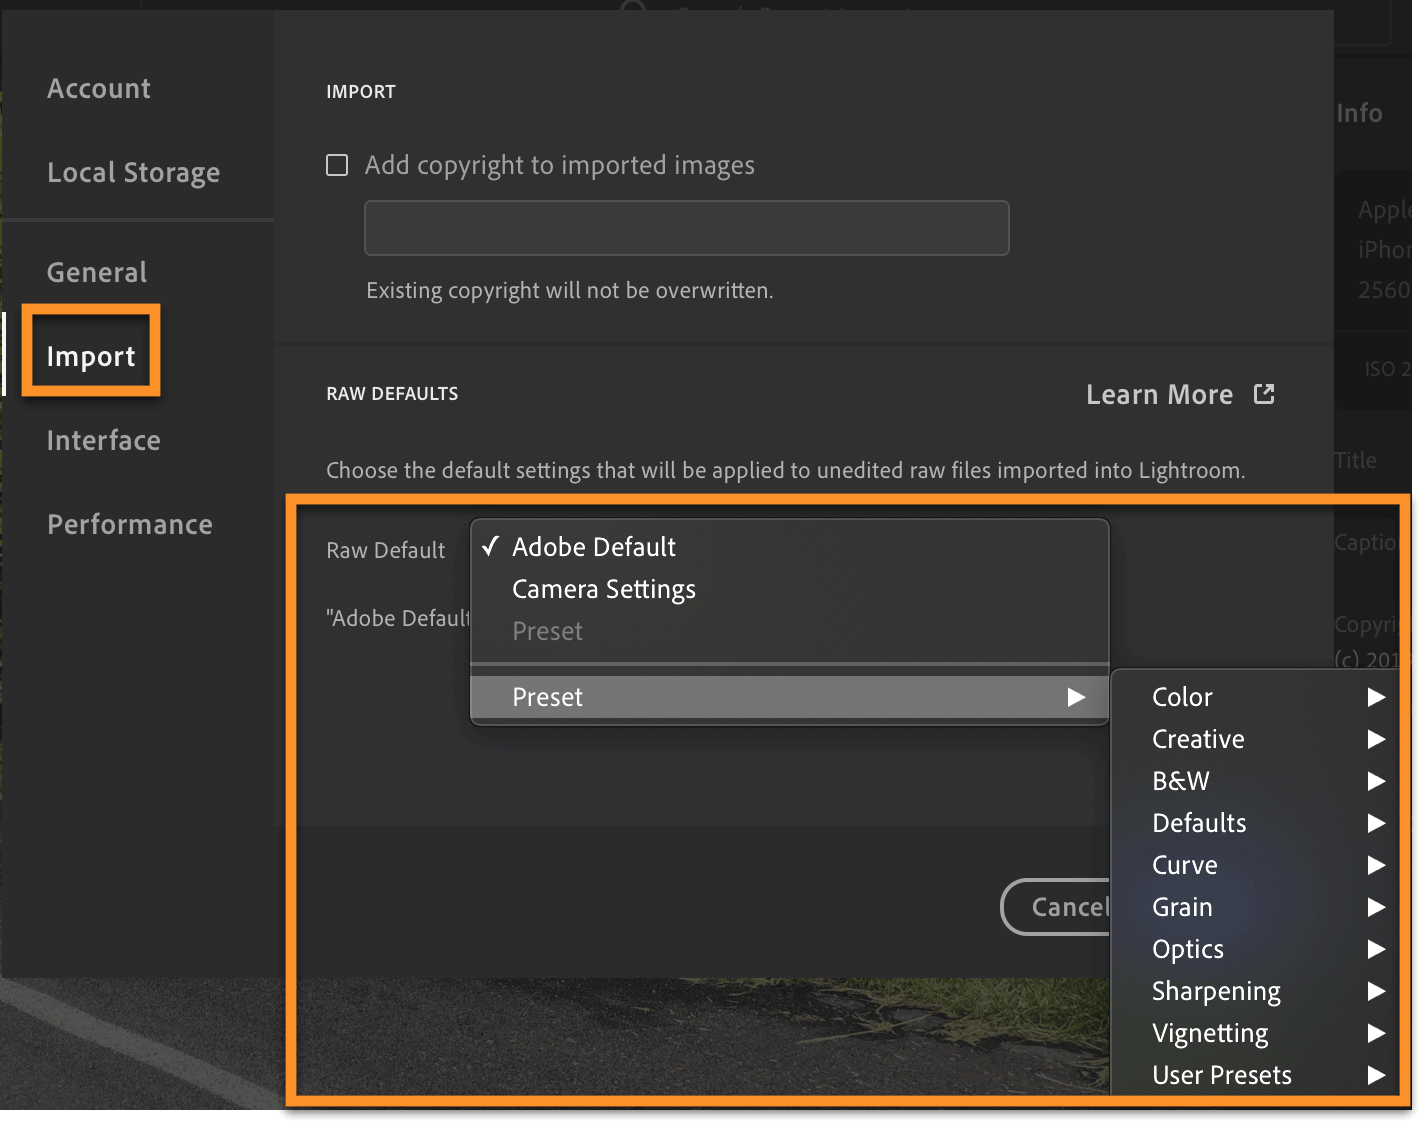
You can choose from Adobe Defaults, Camera Settings (which will apply a camera matching profile, and for a few newer cameras, additional in-camera settings that Lightroom can read from your image metadata), and any preset that you have set up with desired default settings.
This has less flexibility than the Lightroom Classic version of setting raw defaults – in Classic you can vary defaults by camera make/model or camera serial number, vary defaults by ISO with ISO-adaptive presets, and use a combination of master-level defaults plus camera-specific for a subset of your cameras.
When you change raw file defaults, these also get applied when you Reset Edits.
iPad: Lightroom to Photoshop
Now send your Lightroom images on iPad directly to Photoshop iPad.
First, so that the largest file possible is sent, make sure that Lightroom has the original downloaded and not just a smart preview – tap on the cloud icon in the top right, then if it’s available choose Get This Original. (If it’s not, and it shows you have a smart preview, that is all you can send to Photoshop – it’s limited to 2,560 pixels on the long edge.)
Then tap on Share, and choose Edit in Photoshop. When you’re done in Photoshop, tap Send to Lightroom, and a PSD file will be sent (and synced to Lightroom on your Desktop!)