 Adobe today released updates to the Lightroom CC cloud-based desktop application (version 1.4), as well as updates to Lightroom CC iOS and Android (aka Lightroom mobile). An update to Lightroom Classic was also released – see my Lightroom Classic article for details on this.
To update Lightroom CC Desktop, go to Help>Updates, and on the Apps tab click on Update next to Lightroom CC (not Lightroom Classic or Lightroom CC 2015!).
To update Lightroom CC iOS or Android, find the app in the App Store (iOS) or Google Play Store (Android) and tap on Update.
Preset and Profile Syncing
Now presets and profiles you create (or import) anywhere in the Lightroom CC ecosystem will sync automatically to everywhere else – Desktop, iOS, Android, and web.
Note that Lightroom Classic is not included in this ecosystem. The first time you open Lightroom CC Desktop after installing today’s updates, your Classic presets will sync to the Lightroom CC ecosystem, but this is a one time sync. Going forward if you want to get updated or new Lightroom Classic presets into the Lightroom CC ecosystem you’ll need to import them into Lightroom CC Desktop. Read this Adobe Help document for more information on syncing presets and profiles and Lightroom Classic.
New Camera Support
Raw files from the following new cameras can now be imported:
- Fujifilm X-T100
- PENTAX K-1 Mark II*
- Phase One IQ3 100MP Trichromatic**
- Samsung Galaxy S9
- Samsung Galaxy S9+
*Dynamic Pixel Shift Resolution is not currently supported. Opening images captured in this mode will display only the first raw image frame.
** Preliminary Support
Click here to see a list of all cameras supported in each version of Lightroom (and Camera Raw).
New Lens Profiles
Other Lightroom CC Desktop Enhancements
Creating Presets: Choose Settings
Now when creating a preset you can choose which edit settings to include. Up until now all settings have been automatically included, so when you apply the preset to another photo, it wiped out all edits performed on that photo before the preset.
Background: Presets are saved combinations of edit settings. If, for example, you often apply +25 contrast and +25 saturation, save these as a preset so that you can apply them to other photos with one click.
To create a preset, in Edit view, click on Presets in the bottom right. Then click on the “…” in the Preset panel that opens and choose Create Preset. Put a checkmark next to settings you want to include – note that clicking on the sideways triangles to the right will reveal individual settings.
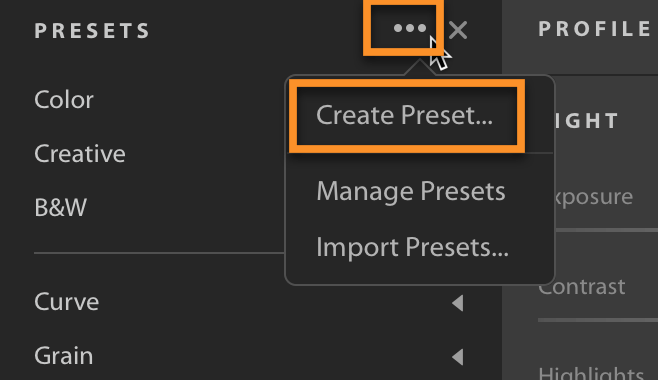
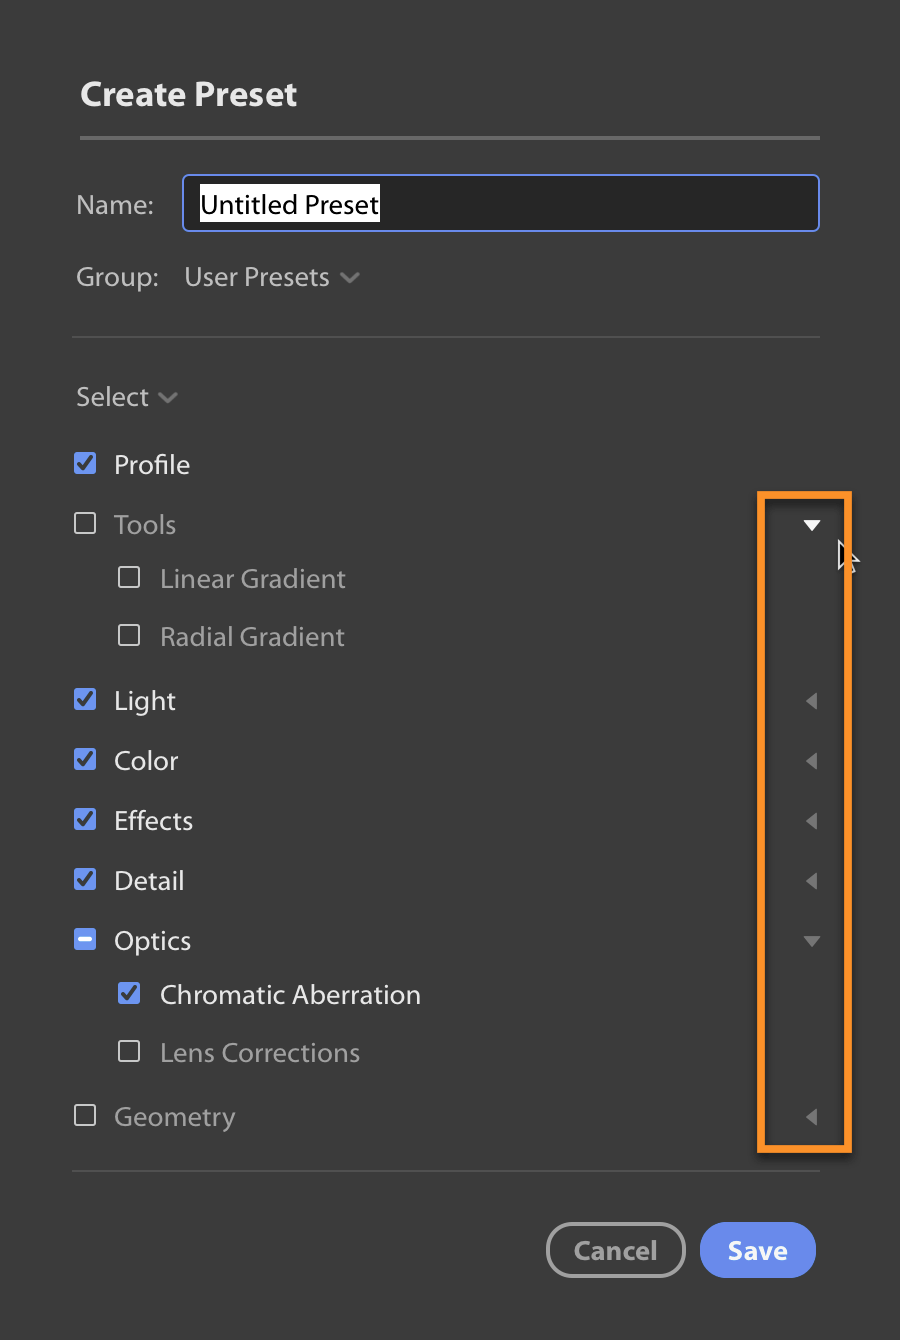
To apply your preset to another photo, select a photo, then click on Presets in the bottom right, then choose your preset from User Presets. (There’s no direct way to apply a preset to many photos at once – see my note in the Copy/Paste section.)
Batch Editing
Now copy all or any subset of edit settings from one photo to one or to many.
To copy, click on the three dots at the bottom of the edit strip, and choose Copy (Cmd/Ctl-C) to copy all settings or Choose Edit Settings to Copy (Cmd/Ctl-Shift-C) to select a subset. Click on the sideways triangles to drill down to specific settings.
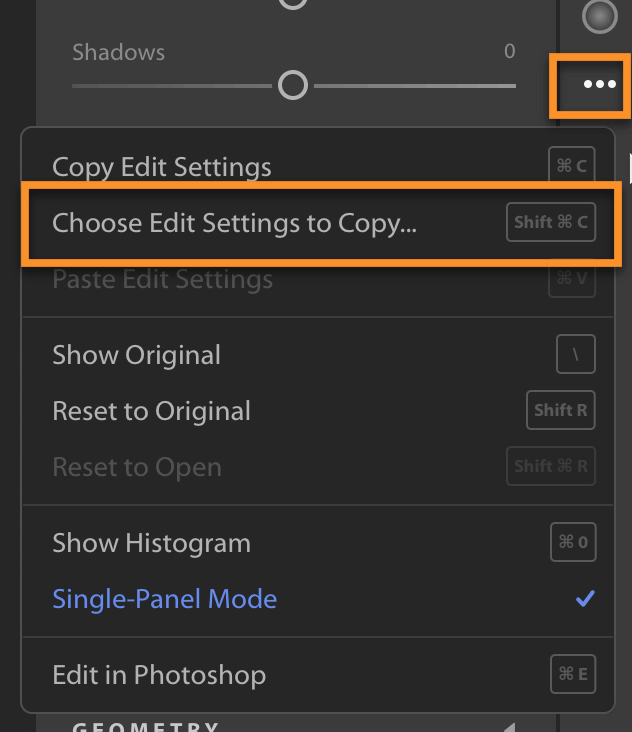
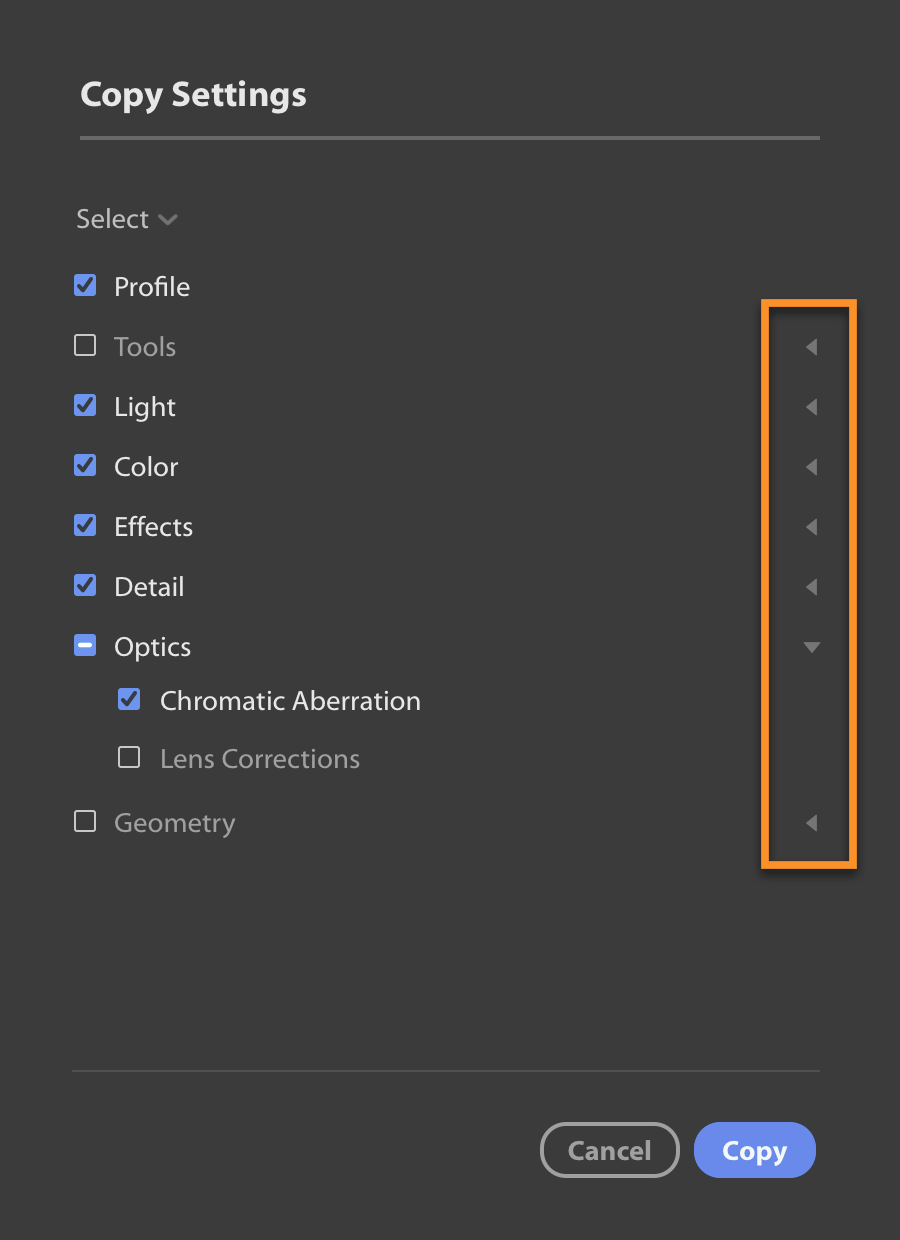
To paste settings to one photo, select it, then do Cmd/Ctl-V or click on “…” and choose Paste Edit Settings.
To paste to 2+ photos, either go to Grid view (G), select them and then paste with Cmd/Ctl-V, or in single-photo view select them in the filmstrip below your image and use Cmd/Ctl-Shift-V.
These enhancements bring Lightroom CC’s Copy/Paste close to the capabilities of Lightroom Classic’s Sync. However there is still no direct way to apply a preset to many photos at once – you can apply the preset to one photo, then copy and paste to many, but you either have to know what settings the preset uses and choose those in the Choose Copy Edit Settings, or assume it uses all settings, and accept that if you had done any prior work to the images, that will be wiped out.
There is also no direct way to reset many photos at once. (In the meantime, reset one then copy and paste.)
Up until now the lack of batch editing capabilities has kept many Lightroom Classic users from considering a switch to Lightroom CC. I suspect that once the presets and reset issues above are resolved, more users will consider switching. (Click here for a definitive list of what Lightroom CC doesn’t have that Lightroom Classic does.)
Visualize Spots
Now in the healing brush turn on Visualize Spots (shortcut A) to more easily identify sensor dust and other spots for removal. Adjust the Threshold slider to view just the highest contrast candidates, or also lower contrast ones. Either fix the spots with Visualize Spots turned on, or for greater accuracy, identify a spot, toggle VS off (A), fix the spot, then toggle VS on again.

HEIC File Support on Mac OS
The new default image type when shooting with an iPhone camera is HEIC/HEIF. Lightroom CC 1.4 adds support for importing and editing these files, but at this time only on Mac OS High Sierra (10.13.x).
You’ll see that the file name ends in .heic, and the Info tab will show the HEIC file type:
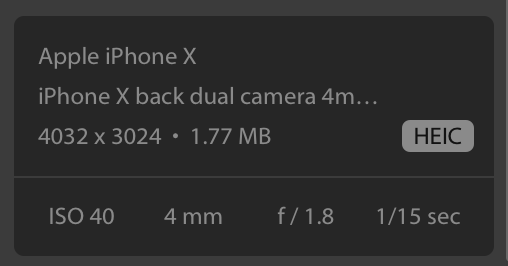
Users of other operating systems can use third-party apps to convert their HEIC files to JPEG before import. Also consider having your iPhone capture JPEGs for now – on your phone go to Settings>Camera>Formats>Most Compatible.
HEIV video files are not yet supported in Lightroom on any operating system.
Album Sharing Options
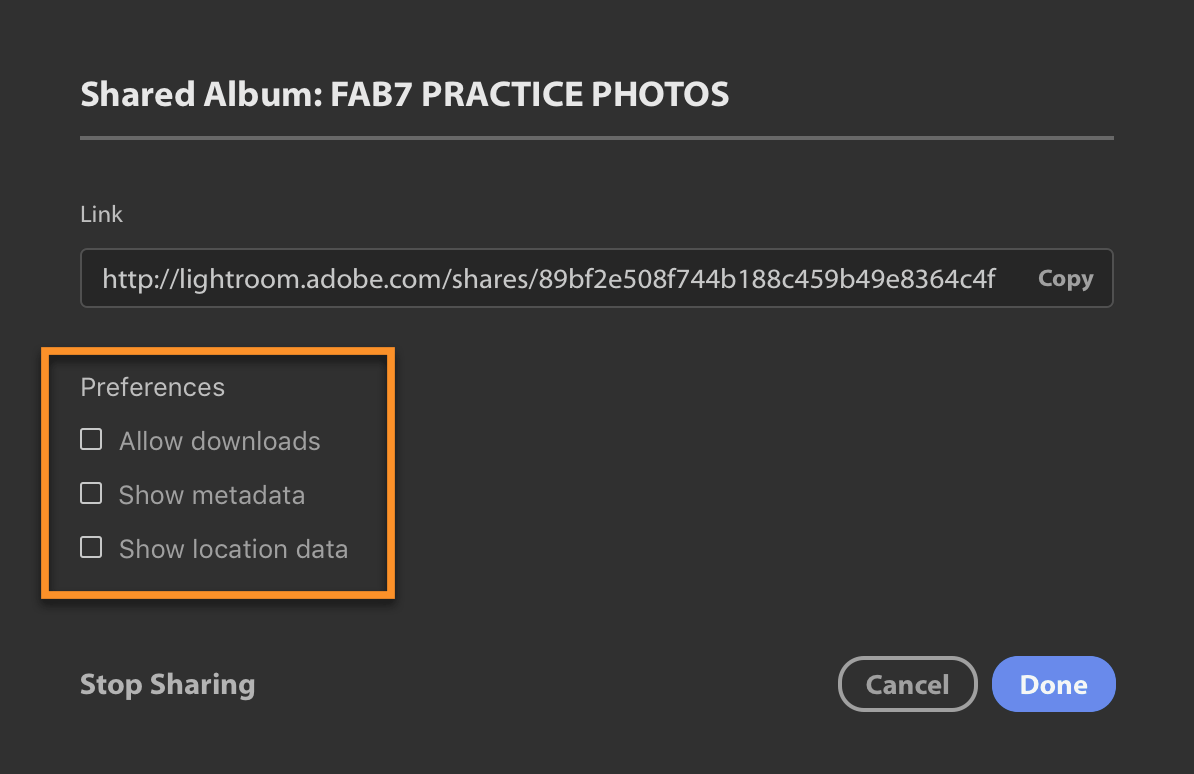
Now when you share an album (right-click on an album > Share Album), you’ll have direct access to options to allow downloads, show location data, and show metadata. (Previously setting these required going to Lightroom web.)
Reset to Open
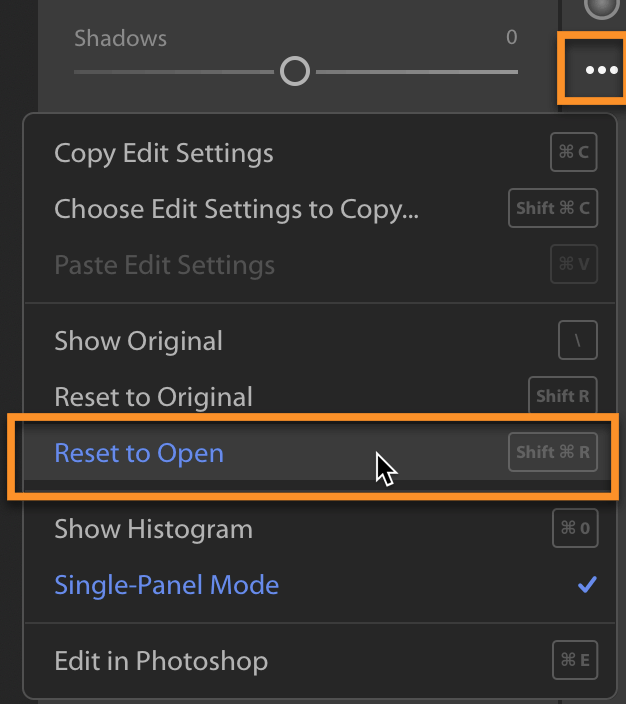
Previously you could reset your photo to how it looked originally, removing all edits. Now you can also Reset to Open – that is, to how it looked when you started your current editing session of this photo.
Change Selective Edit Overlay Color
Now with Shift-O you can change the overlay (mask) color from red to green in the brush, linear gradient and radial gradient.

Windows Touch-Enabled Devices
On Windows touch-enabled devices, now use your finger to draw with the brush tools, linear gradient and radial gradient.
Sort by File Name
Now sort your images by file name:
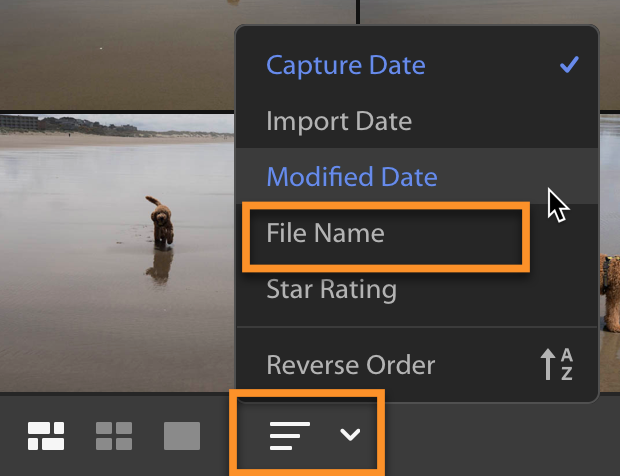
Note that we still can’t see file name in the grid. Instead, select a photo, then open the Info (i) tab to see its file name.
Connect Your Devices
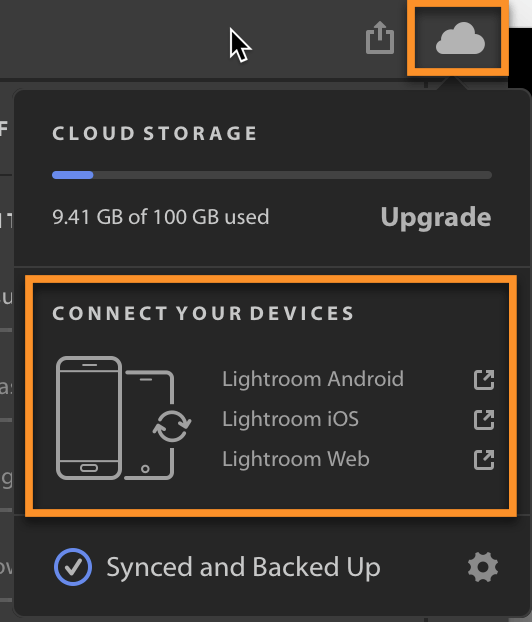
Easily get started with Lightroom CC for iOS and Android, and Lightroom web. Click on the cloud icon in the top right, then on the device you want to connect. If it’s an Android device, you’ll be sent to the Google Play store to download Lightroom CC to your Android device. If it’s an iOS device, Lightroom CC will send your mobile device a text with a link to Lightroom CC in the App Store. Once you install the Lightroom CC app and sign in, all your photos from Lightroom CC Desktop will appear!
Other Lightroom CC iOS (iPad and iPhone) and Android Enhancements
- New healing (and cloning) brush in both Android and iOS:

The brush has size and opacity settings, as well as heal and clone – in other words, all settings and capabilities as this tool has in Lightroom CC Desktop, and all but Flow and Density in Lightroom Classic. In mobile it’s rather frustrating to not be able to see what you’re painting because your finger is in the way, but I’ll take it!
- Now create presets in both Android and iOS:
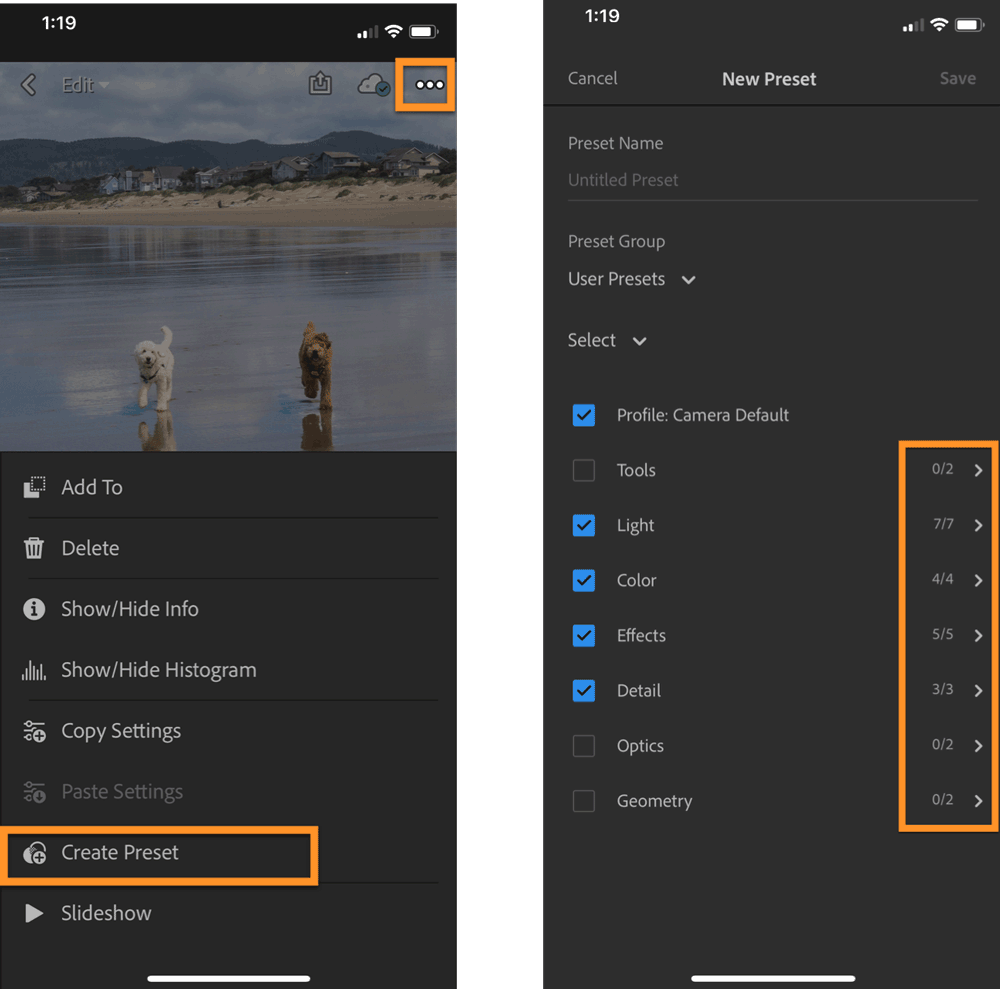
Presets created on mobile devices will automatically sync to Lightroom CC Desktop.
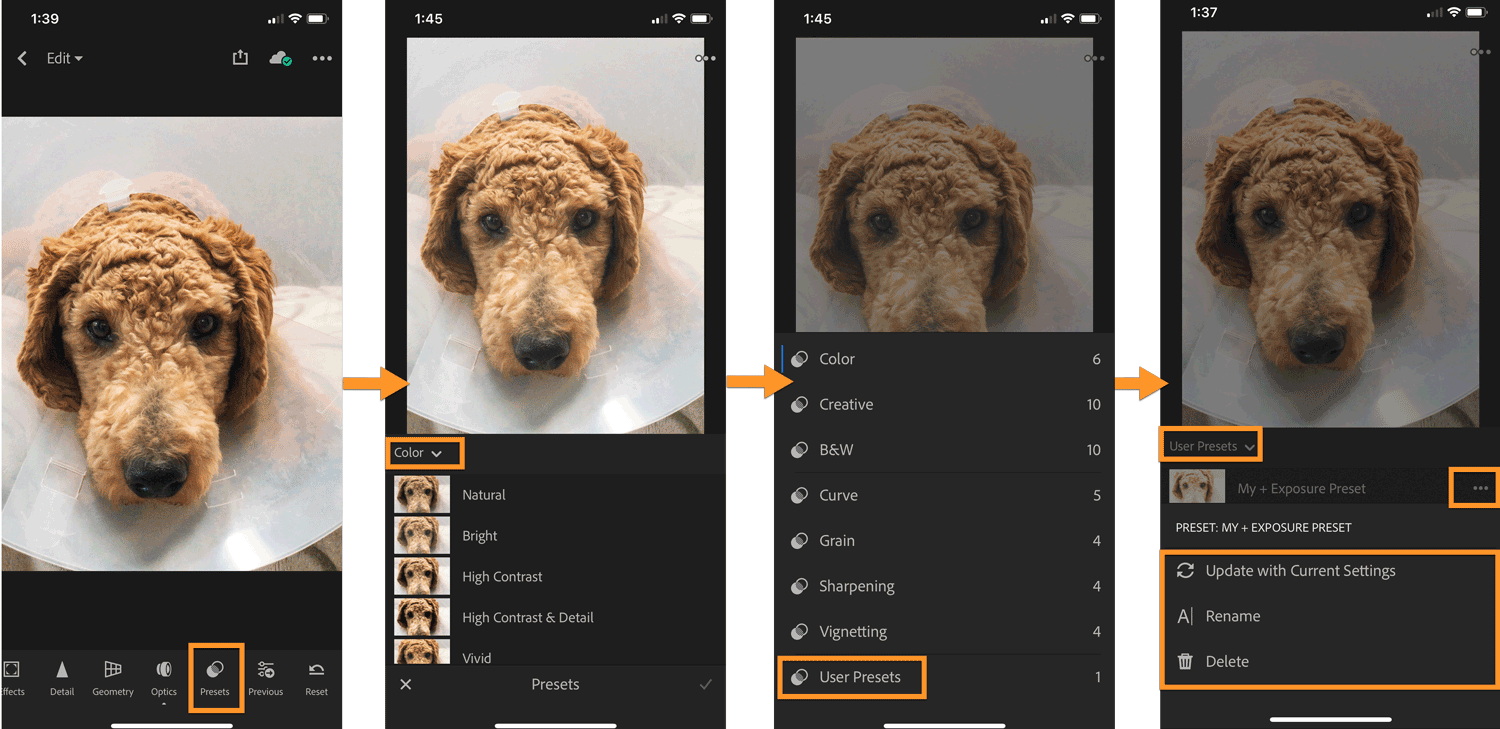
To apply a preset, choose Presets from the editing options, then if it’s not in the preset category displayed, tap on the category, select a category from the list, then tap on the preset. For user presets, you’ll also now find preset management options: Update with Current Settings, Rename, and Delete. These changes sync back to Lightroom CC desktop.
- Fix chromatic aberration (red/cyan or blue/yellow fringing) in the Optics tab – iOS only.
- Read what’s new in the latest release. Go to Settings (tap on the Lr icon in Collections view), then tap on What’s New.
- HEIC file support (iOS only)
- Show/hide preset and profile groups (Android only)
- Use new features before they’re officially released, with technology previews.
-
- IOS: Guided Tutorials and Long Exposure
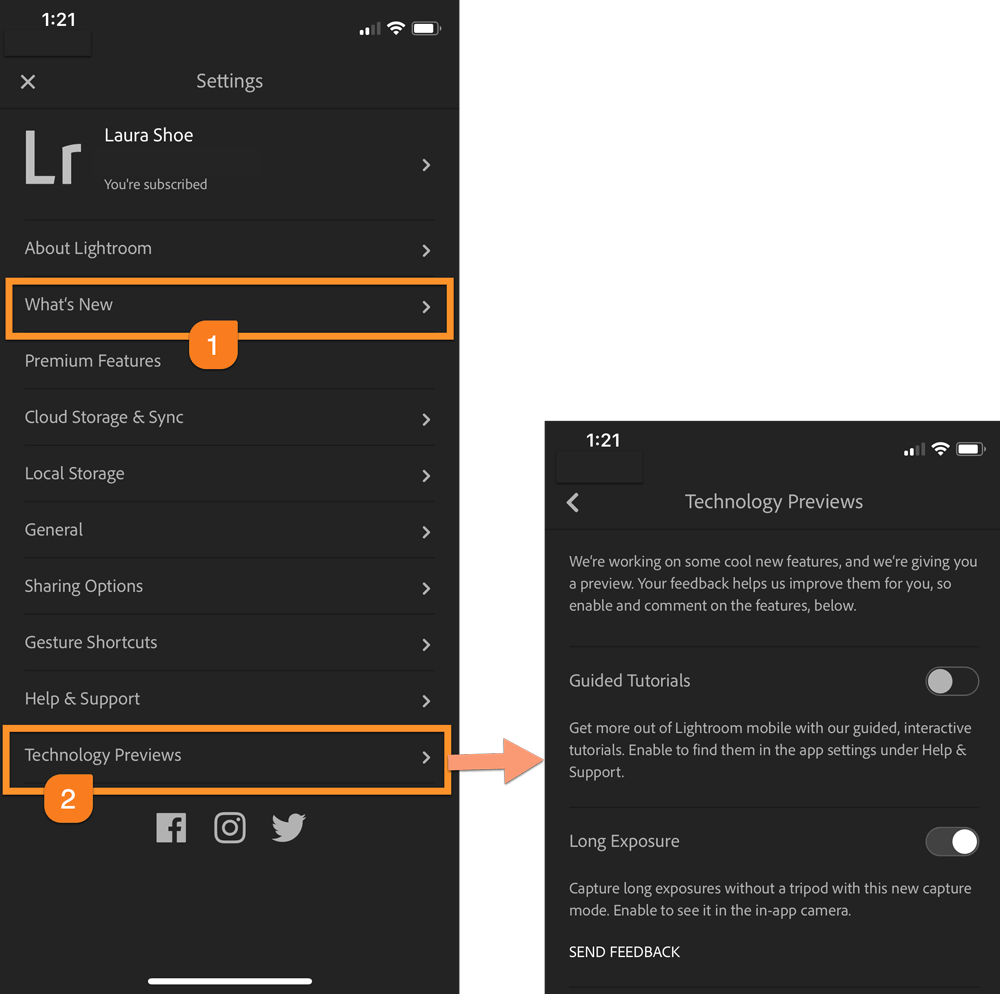
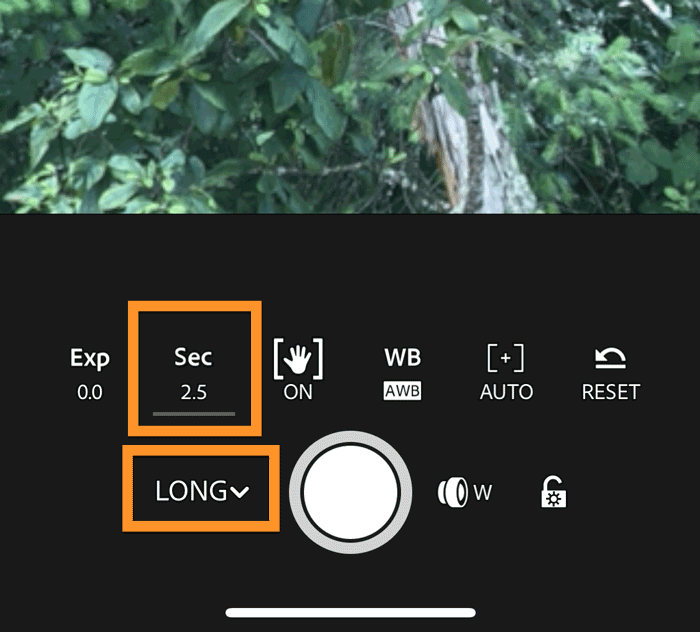
Long Exposure simulates slow shutter-speed capture of up to 5 seconds by capturing several images and merging them together. It will align the images before merging them, so it does not require that you use a tripod. Simulation of long exposure is required because the iPhone shutter can’t be kept open. After turning Long Exposure on in Technology Previews, then you’ll find the capture mode in the Lightroom camera:
- Android technology preview: expanded HDR support – if HDR isn’t supported in your Android device you can turn on support by turning on the technology preview.
-
Related Content
