
 It’s easy to create simple black, white or transparent photo borders in Lightroom, using the Effects panel in the Develop module.
The Effects panel is on the right side, towards the bottom of your panels. Set the Style to Paint Overlay, so that highlights don’t show through your border.
1. Black film-style border
Set Amount to -100, Midpoint to 0, Roundness to -100 and Feather to 0.

Classic Black Film-Style Black Border
2. White border
Set Amount to +100, Midpoint to 0, Roundness to -100 and Feather to 0.
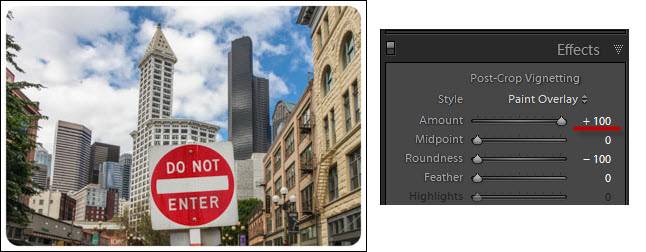
White Border: Amount set to +100. (Note that thin black frame is not part of the result.)
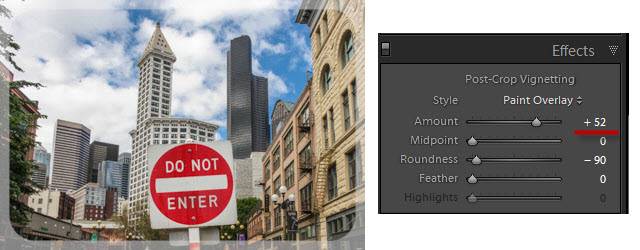
3. Wider border
Increase Roundness:
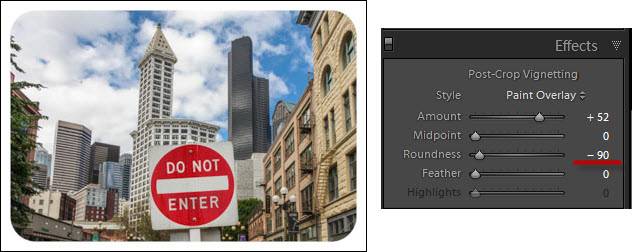
Increase Roundness to Widen Border
4. Softer Border
Increase the Feather Setting to soften the border edge:

5. Transparent Border
Set Amount to any value greater than 0 and less than 100:
Adjust Amount Setting to Make Border Transparent
Some of you will be excited by this functionality, and some of you will be disappointed that there isn’t more flexibility — for example, to create squared-off corners, colored borders, and multiple borders. Timothy Armes has written a Lightroom plug-in, LR/Mogrify 2 that allows one to create more sophisticated borders as you export copies of your photos:

Alternatively, you could design a layout with borders using the Print module, and print your result to JPEG rather than to your printer. Stay tuned for a future post on easy ways to do this.
[sc:signup]Related Posts:
Creating Cool Photo Layouts Using the Print Module