 The Alt (PC) or Option (Mac) key reveals a lot of convenient additional functionality in most or all of Lightroom’s modules. The problem is, there is nothing on the screen to tell you where holding it down may reveal something useful. In this post I will list all of the Alt/Option functionality that I have found in the Develop module. If I miss something that you are aware of, do leave a comment to let us all know! I’ll follow up with one or more posts on its use in other modules.
Alt/Option Key Uses in the Develop Module
- All Panels: Alt/Option-Click on a panel name (e.g. Basic, Tone Curve, Detail) to open that panel and collapse all others in the column (if you are not already in Solo Mode, which you can get to by right-clicking on a panel name.)
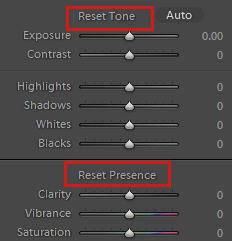
- Right-hand Develop panels: Within each panel except the point curve, holding down Alt/Option will reveal a Reset button that you can click on to reset all sliders in that section back to their defaults.

- Basic Panel – holding down Alt/Option on the slider triangle as you slide:
- Exposure, Highlights, Whites will reveal completely clipped (blown-out) highlights in white, and individual colors clipped in color. Black means not clipped.

- Shadows, Blacks: will reveal clipped shadows in black; white means not clipped.
This functionality can help you see where your clipped highlights and shadows are, and help you to set your sliders so that you don’t clip them. Many images look good with tones that range from almost pure black to pure white — but remember that your goal is to produce something that looks good aesthetically.
- Detail Panel– holding down Alt/Option as you slide the slider triangle:
- Amount will show the image in black and white with sharpening, so that you are not distracted by the color of the photo (sharpening happens on what is called the luminance (or b/w) channel of your photo.
- Radius: shows in black and white how far out from edges in your photo sharpening is being applied. (What is in gray is unaffected).
- Detail: will reveal in white what detail in your photo will be sharpened
- Masking: will reveal in white which portions of your photo will be sharpened
Read more about sharpening in my Lightroom sharpening three-part series.
- Luminance Noise Reduction (Luminance, Detail, Contrast): displays your photo in black and white (i.e. displays the luminance channel), so you can focus on the specks of luminance noise, without being distracted by color.
- Lens Corrections – Color Panel Defringing– holding down Alt/Option as you slide:
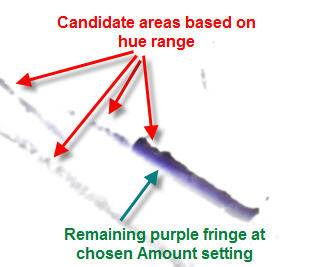
- Between the two purple or green Hue sliders: shows in black and gray the areas that are considered fringing and will be affected, given the range of colors defined by the two Hue sliders.
- The Amount slider triangle: shows the same thing the above does, with any remaining fringing shown in purple or green (increase amount until it disappears.)

Holding the Alt/Option Key Down on the Amount Slider Triangle
- Adjustment Brush: holding down Alt/Option changes your brush to the eraser brush, so you can undo or erase areas you didn’t mean to paint over. You’ll see a minus in the center of the brush. Letting go returns you to your normal brush, with a plus in it. (Here’s a video on using the adjustment brush – it was made with Lightroom 3, but applies to Lightroom 2 and 4 as well.)
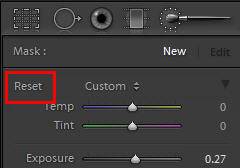
- Adjustment Brush and Graduated Filter: holding down Alt/Option changes the word Effects to Reset – click to reset all your slider (or instead, just double-click on the word Effects)

- Reset Button: holding down Alt/Option will change this button (bottom right, above the filmstrip) to Set Default… Clicking on this will set whatever Develop sliders you have set for your current photo to be the new Lightroom defaults, for all images imported from that point on. If you always prefer to apply more sharpening, for example, Reset your photo so that it is at the Lightroom defaults for all sliders, set the preferred sharpening amount, and then Set Default.
WIthout Alt/Opt Key
With Alt/Option Key Held Down
- Sync Button: with multiple photos selected, the Sync button allows you to copy changes from one photo to the others. By default, the Sync button has “…” after it. Clicking on it brings up a dialog to allow you to choose which settings you want to apply. Holding down the Alt/Option key removes the “…,” and clicking on it bypasses the settings dialog and applies whatever settings were last used in Sync. Read more about Sync and Copy in this post.
Without Alt/Option
Without Alt/Option
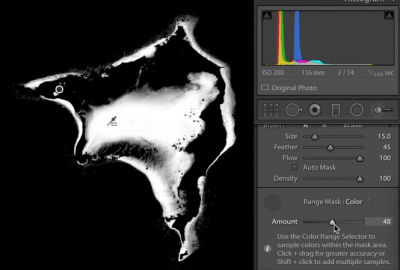
- Lightroom Classic Range Mask feature: hold down Alt/Opt as you drag the Range Mask sliders (Amount for color; Range, Smoothness for luminance) to see the effect of the slider values on the mask. (For a video tutorial on Range Mask, scroll down to the second video on this page.)

What Alt/Option Develop module secrets have I missed? Leave a comment below.
[sc:signup]