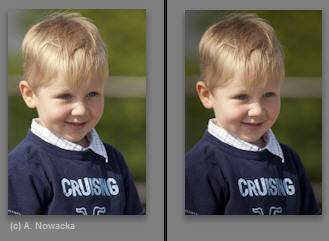
I love Lightroom’s adjustment brush, because it allows me to make local changes to my photos very precisely. I can lighten or darken a particular area, add or reduce contrast or saturation, add or reduce clarity, sharpen or blur. I can even add or change the color of an area. Or I can do a combination of any of these things. However, using the adjustment brush requires painting where I want to make the change, and let’s face it, this can be a lot of work.
Because it can be a lot of work, it is my tool of last resort. If I can accomplish my goal with a slider instead, I will always choose the slider. Here are the tools I will consider first — they often allow me to make local changes without painting:
1. The HSL Panel
If the change I want to make is localized to a particular color in the photo, this is the perfect tool. For example, I want to darken and intensify the saturation of the sky in the photo below. The sky is the only blue in the image, so I can accomplish my goal in five seconds by using the HSL panel to increase blue saturation and reduce blue luminance. (This post explains how to use the HSL panel.)

2. Vignetting in the Effects Panel
Often I want to darken (or lighten) the edges of a photo to bring more focus to the center. If I am ok with all edges being affected evenly, I will go to the Effects panel and add a vignette. Vignettes don’t have to be so heavy-handed as to be obvious, and despite my example below, they also are not just useful with portraits. (Here’s a post with more on vignettes.)
3. Fill Light
If I am trying to brighten the shadows (darkest tones) in a photo, the Fill Light slider in the Basics panel is a powerful option. Sometimes it is too broad in its definition of shadows, but I find that I often can counteract this by also reducing Brightness. In the example below, Fill Light has affected everything except the sky — exactly what I needed:

Update: In Lightroom 4, use Shadows instead. To work on the highlights, use Highlights.
4. The Tone Curve
If the area is defined by a particular range of tones, the Tone Curve is a great tool. It lets you brighten or darken the shadows, midtones, and/or highlights. (Here’s a post on the tone curve.) In this example the top of the bench seems a little bright to me. There is nothing else in the image as bright as the bench, so I can use the tone curve — reducing highlight brightness takes care of the issue.

5. The Graduated Filter Tool
When my issue isn’t isolated to a particular color or range of tones, and a vignette won’t work, then it really is time to turn to Lightroom’s local tools. If the issue is one that starts out on the edge of a photo, and if I can get away with a soft line, I will choose to use the graduated filter, rather than the adjustment brush. Using the filter involves just one click-and-drag and setting a slider … still less work than painting.
In this example, I dragged upward, and reduced brightness, and addedclarity and contrast.

If none of these will allow me to target my area, I will finally turn to the adjustment brush. Again, I may try to avoid it, but I still do love it! Here a video on how to use it, from my Lightroom Fundamentals and Beyond Workshop on DVD.
[sc:signup]
