
Adobe today released Lightroom mobile 2.8 for iOS and 3.0 for Android, with some great changes and additions. Download the updated Lightroom mobile iOS app from the Apple App store or the Android app from the Google Play store on your mobile device. While they are free to download and use, you’ll need a Creative Cloud subscription to be able to sync photos and editing to and from Lightroom on your desktop computer.
Android
The app has been rewritten from the ground up using Android’s native architecture. It is faster, and the new design is intended to look and feel more like both Lightroom and Android.
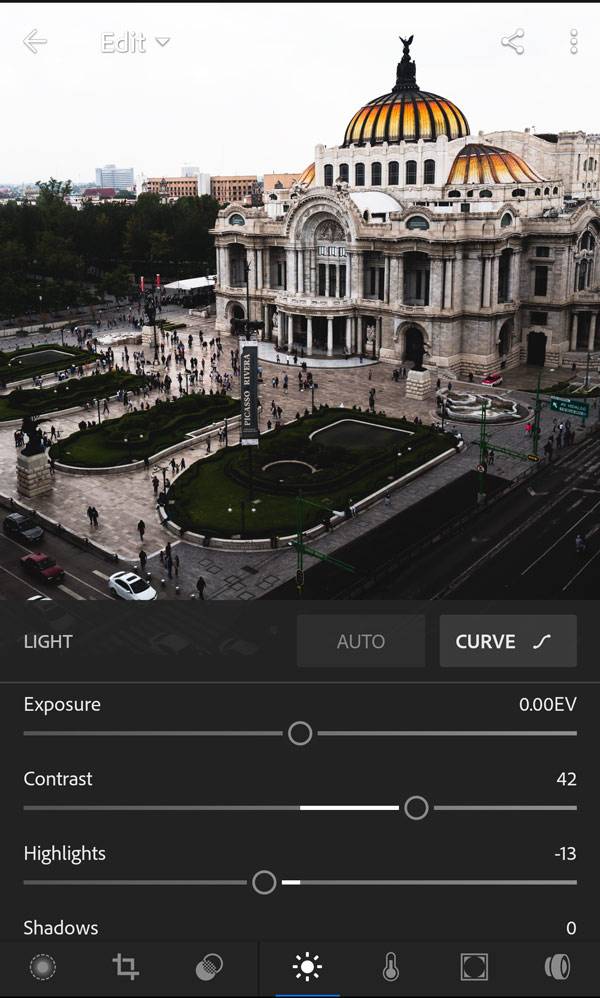
Photo courtesy of Josh Haftel of Adobe
iOS
iPads: Major Editing Layout Revamp
As the iPhone app had already, editing and review (assigning stars and flags) now happen on the Edit & Review screen. There is also an Info screen where you can view photo metadata and type in title, caption and copyright (don’t forget you can use Siri!), and a Comments screen for viewing and responding to comments from Lightroom web.
The edit layout has been greatly improved and now feels more consistent with Lightroom Desktop, albeit with a more modern interface.
Note that speed review (being able to swipe up and down in the image to rate and flag) is gone for now, but it should return in some form in a later release.

iPad redesigned Edit & Review screen. See orange box for Edit & Review, Info, and Comments screen icons. This screenshot also shows the new Detail panel, with sharpening and noise reduction.
iPads and iPhones: Detail Panel Added
Full sharpening and noise reduction functionality has been added.
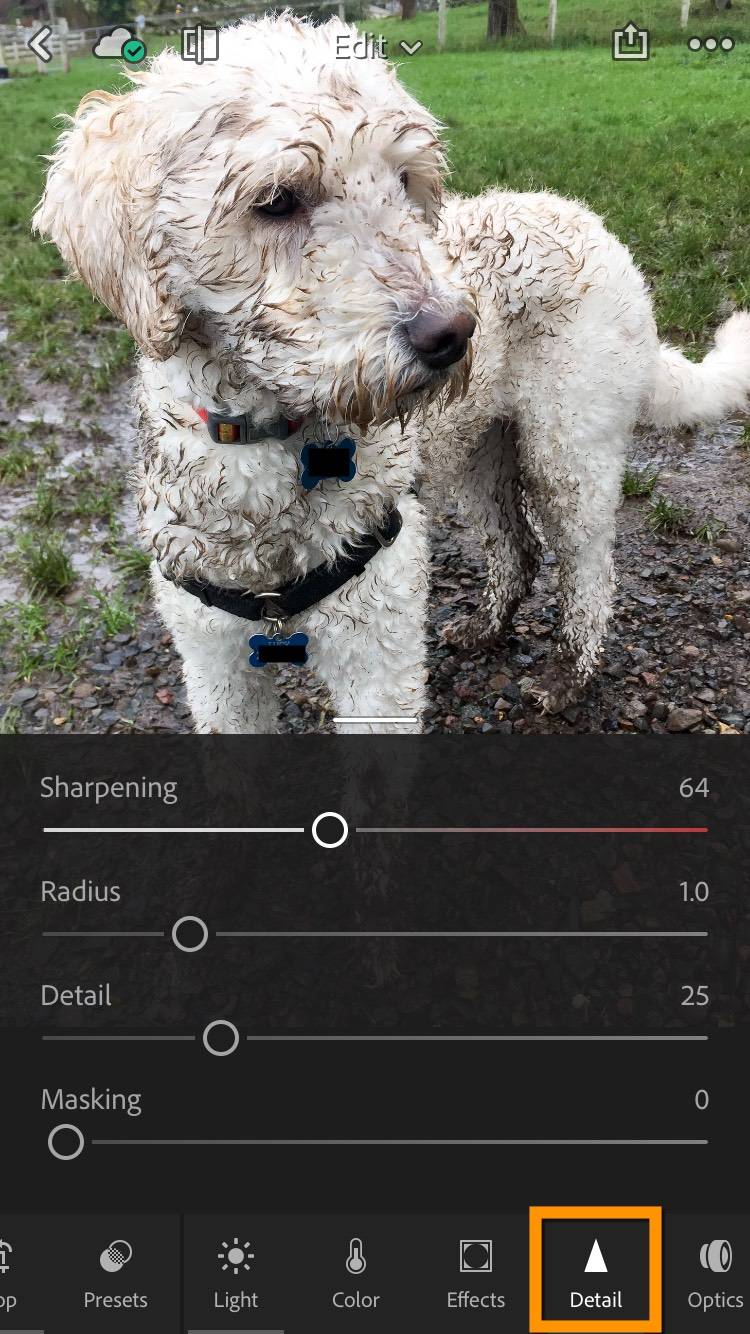
Once you add a positive amount of sharpening, (luminance) noise reduction, or color noise reduction, the remaining sliders for each become activated.
To see the black and white mask for Masking, slide the Masking slider with one finger while holding another finger down on the photo.
For more information on how to sharpen your photos, see my article on capture sharpening in Lightroom.
iPads and iPhones: Brush Tool
I’m pleased to see the addition of the adjustment brush tool to the Selective adjustments section, where it joins the radial and linear (graduated) tools. With the brush tool you can specify by painting what areas of your photo you’d like to edit. For example, darken just a sky with negative exposure, brighten and take yellow out of teeth with positive exposure and negative saturation, or soften skin with – sharpness or negative clarity. If you want more precision than you can get with your finger, use a stylus.
Here’s the scoop on how to use it – I’ll show the iPhone app, but it works the same with the iPad:
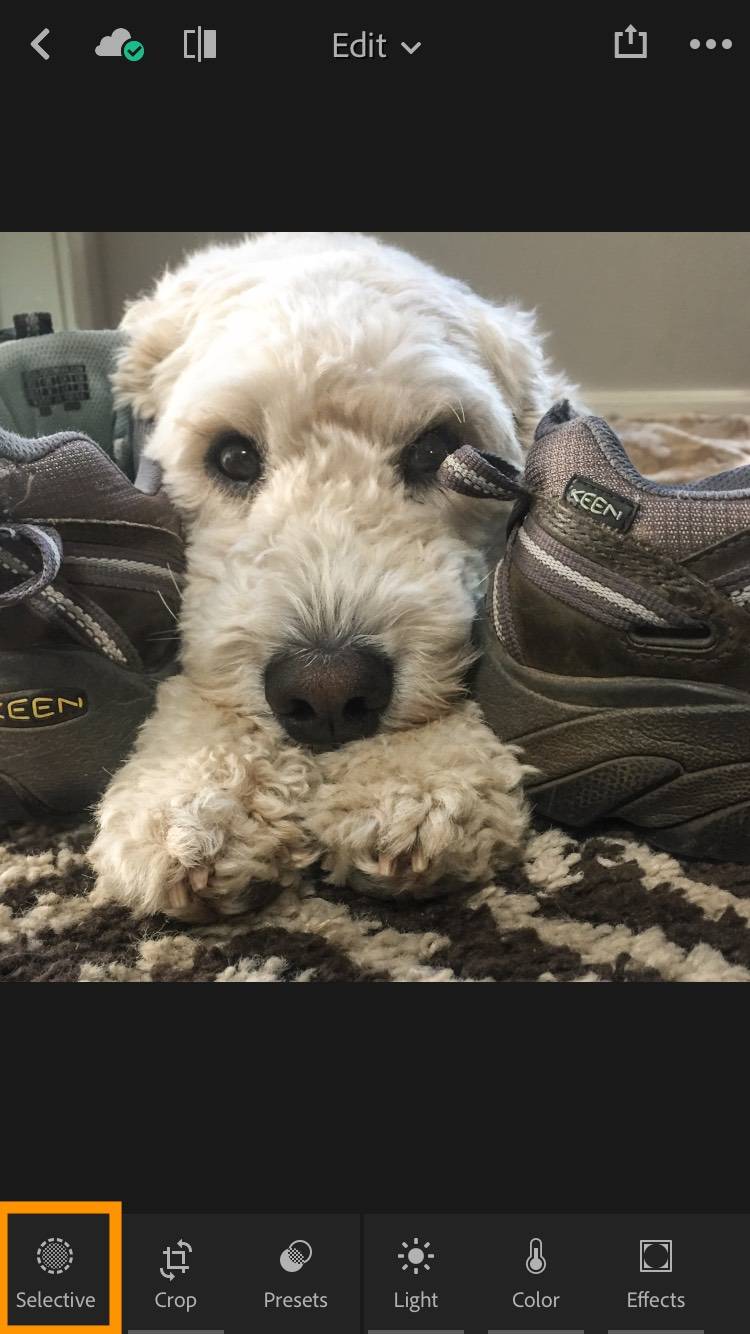
- Tap on the Selective icon in the bottom left of the Edit screen on iPhone or near the top right on iPad:
- Tap on the + in the top left to add a new adjustment
- Choose the brush from the list of brush, radial and linear
- Three circle icons appear on the left edge, from top down: brush size, feathering amount, flow. You’ll need to set these BEFORE you paint. Tap and hold on Size and slide your finger up or down to increase or decrease size – you’ll see a preview in red. If you forget which circle controls which setting, notice as you tap and hold that a label appears above the photo, e.g. “Size 25”

- Tap and slide up or down on the center circle to adjust feathering – the red preview will show how hard or soft/feathered the edge becomes.
- Tap and slide up or down on the bottom one to adjust flow. A setting of 50 means that 50% of whatever adjustment you choose (e.g. Exposure = +1.00) will be applied the first time you brush, and the second 50% the second time you brush.
- Now at the bottom of your screen on iPhones and to the right on iPads, set one or more adjustments that you want to apply – for example to brighten an area, go into Light and set a positive Exposure adjustment. You can apply as many adjustments as you want together – e.g. brighten, add contrast and add clarity to an area by setting these three sliders.
- Paint the area you’d like to affect. If you’re not getting the effect you want, refine your editing sliders. If flow<100 and you want more of your affect, paint over the area again.
- If you painted somewhere you didn’t mean to, tap on the eraser brush, set its size and feathering and paint
- If there is another local adjustment that you want to do with different editing instructions, tap on the + again to add it.
- If you have multiple edits and want to go back and work on a previous one, click on its triangle – inactive ones will be gray; the active one that you are working with will be blue (as shown in the screenshot above)
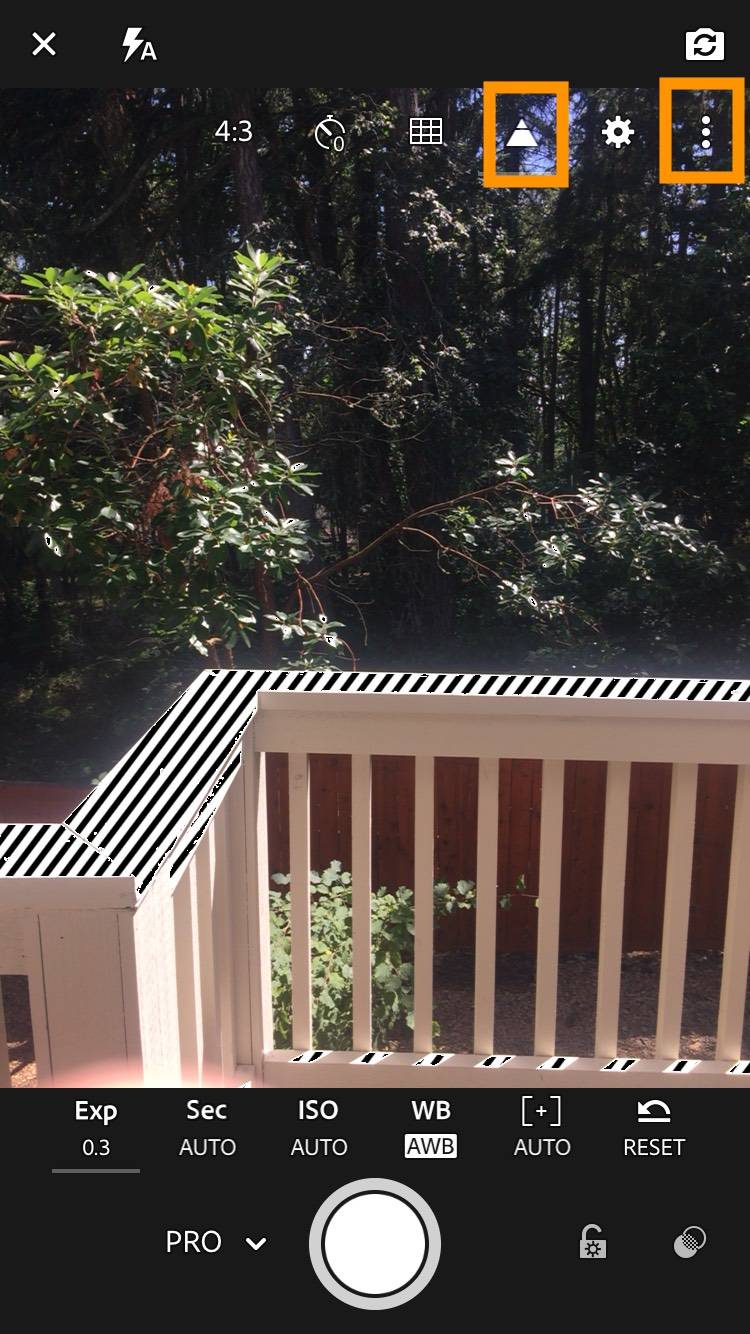
iPads and iPhones Lightroom Camera Highlight Clipping Indicator
Turn this feature on in the Lightroom camera to see “zebra stripes” anywhere in the image you’re composing where you will blow out highlights given the current exposure. Swipe left to reduce your exposure, right to increase it. To turn the feature on or off, tap on the three dots, and then on the triangle (shown below.)
Related Post: Read What’s New in Lightroom (Desktop) 6.12 and CC 2015.12!

Excellent description of the updates, thank you!
This more clear with more detail than the description Adobe provides.
As always please keep us posted as to the stability of the update. :-)
You’re welcome, Art!
Thanks for the updates – really interesting.
Absolutely gutted about the speed review being taken out of the mobile app. This was pretty much the only thing I ever did on the iPad! I’ve got 18,000 photos from a 9month trip to go through and this method is so much faster than using on a pc/mac Lightroom.
You’re welcome, Ben. You can leave feedback about speed review on this Lightroom Journal page.
Hi,
Do you happen to know if there is any chance that Lightroom will support the “Live” function of iPhone 7 ?
Photos taken in this mode are in fact short videos and the feature is lost when the photos are imported to LR (while they are still active when they’re imported to the Photos app)
Best regards
I thought it already did, Andrzej, so I’m afraid I’m not much help on that.
Looks like the option in settings in LRM to “Load Full Resolution” is gone. Do you know hat has replaced that or how to ensure that full resolution copies of photos imported directly into an IOS device are retained and loaded for editing?
Thanks in advance!
You’re correct that that option has been removed, Rick. For images for which the original is available (as you say, those imported directly into LRM, not those initially synced from LRD, LRM will now automatically download the original when it’s selected for editing. Double-tap on your image to see the information display – you’ll see that it will show Original rather than “Preview” or Smart Preview. Note that LRM only caches two originals – as you load a third, the first is discarded.
Apparently if you select Enable Offline Editing for an individual collection, this will download all the originals, rather than smart previews, for that collection if they are available. I have not tested this.
Thanks. I’ve been trying to figure this out and Adobe had no info!
Still no key wording in Lightroom Mobile? I was never too thrilled about careful photo edits on a screen smaller than a postcard, but would love to be able to add keywords to photos, especially with the voice recognition of a smart phone. Imagine how much could be accomplished just while waiting in line. Adobe does not seem to even respond to anyone who requests a feature that involves simple text.
My exact question and concern. Is there an option to add key words or tags? I’m off for a 5 month trip and am hoping to be able to tag my library before I get back.
Hi Vert, as discussed in my more recent article about Lightroom iOS 3.0 and Android 3.1, you can now add keywords in mobile – but these keywords will not sync to Lightroom Classic (i.e. the Lightroom program most of us use, with Library, Develop and other modules), they will only sync to the new cloud-based Lightroom CC app – so for most of us, keywording in mobile would be a waste of time.