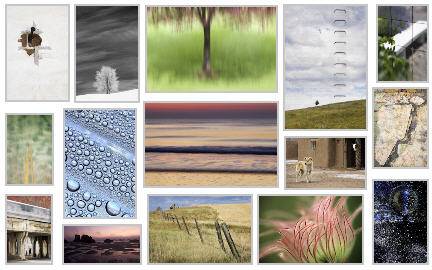
If you watched my video tutorial on the Custom Print Package in Lightroom, you know how to make a collage of photographs. Here’s an example I put together quickly, leaving the background color white, and adding a grey stroke border to the images (the black frame is not part of the result):
You could make your collage any size, and just let Windows or Mac OS X resize and stretch it to fit your monitor, but why not make it the exact size needed, so that it fills your monitor and there is no distortion?
1. Find out what your screen resolution is.
With all the different system versions out there, I can’t tell you exactly how to access this information, but on my Windows 7 machine, I right-click on the desktop, and select Screen Resolution. There I find that mine is 1920x 1200 pixels. If you are on an earlier Windows system, you can go to Start, and type Screen Resolution in the search box, and that should bring it up. Though I am not a Mac user, from my experience you would go to the Apple, System Preferences> Display. It should be somewhere between 800×600 (very low by today’s standards) to 2048xSomething or even higher.
2. Pull together a collection of potential images in Lightroom’s Library module.
Read my tutorial on how to use Lightroom collections here.
3. Set up your page in Lightroom’s Print module.
- First set the orientation of your paper to either portrait or landscape by going to Page Setup in the bottom left corner of the Print module. Don’t worry about the paper size here.
- Choose the Custom Print Package from the Layout Styles on the right side, top panel.
- Next scroll down to the Print Job panel on the right side at the bottom. Set the settings as I have here, just substituting my custom file dimensions for your monitor resolution divided by 100. (Mine is 1920 / 100 x 1200/100 = 19.2″ x 12″). Because we are setting the File Resolution to 100, we will get exactly the pixel dimensions needed.

- You can choose to sharpen your images or not. There is no Screen option, so you will have to choose matte or glossy (correspondingly less or more sharpening.) Here is a link to the beginning of my post series on sharpening.
- Next, design your collage by dragging images up from the filmstrip and resizing. For more detailed instructions and options, watch my video.
- When you are done, save your design, in case you want to modify it some day. (This is not the same as saving the file to use on your desktop — we’ll do that in a moment.) I would do two things:
- Save the layout as a template: at the top of the Template Browser on the left side, click on the +, and give your design a name (e.g. desktop collage). This saves the layout so that you can use it with other images later.
- Save your image / design combination as a Print Collection. Click on the + next to Collections (on the left towards the bottom), choose Create Print, and check “include referenced photos”.
- Save your collage as a jpeg for use on your desktop. In the bottom right, click on Print to File, give the file a name and put it wherever on your computer you will remember. Click Save or OK, and Lightroom will build the collage. If you have many images on your page and they are raw files, this could take a while.
- That’s it for the Lightroom part!
4. Tell Windows or the Mac to use the JPEG you created.
How to set this image as your desktop background will vary by operating system. To find instructions, Google “How to change desktop background in (your operating system).


Hey Laura…love your vibe…your knowledge of LR…and the way you express yourself giving instruction. Helps that you live in SEA…been there once…and loved the city…just don’t care for the rain. :-)
Thanks for sharing your knowledge. I am teaching a class tonight on LR and this collage is a wonderful tip. Merci,
carlos
Thanks, Carlos! I also love Seattle — but the gray drives me crazy. Best wishes with your teaching.
PS…your images are elegant and fun….-c
Hi Laura, Is there any way to rotate cells in the print module to an angle less than the 90 degrees?
Not that I am aware of John. This would be nice — you can either start a feature request or vote on an existing one at http://feedback.photoshop.com/photoshop_family
Thanks for the info. I’ll post the idea there.
hi laura! i just want to ask if how can i save the photo collage in computer after doing it all?im just little bit confused.thanks
Sorry for the long delay, June. Yes, you can print to JPEG.