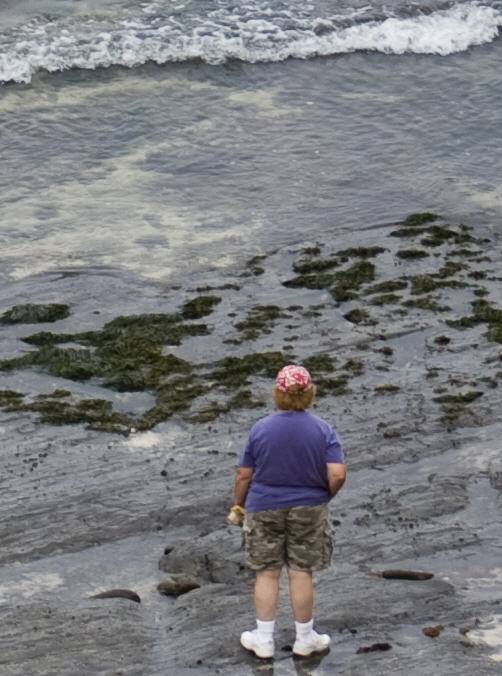
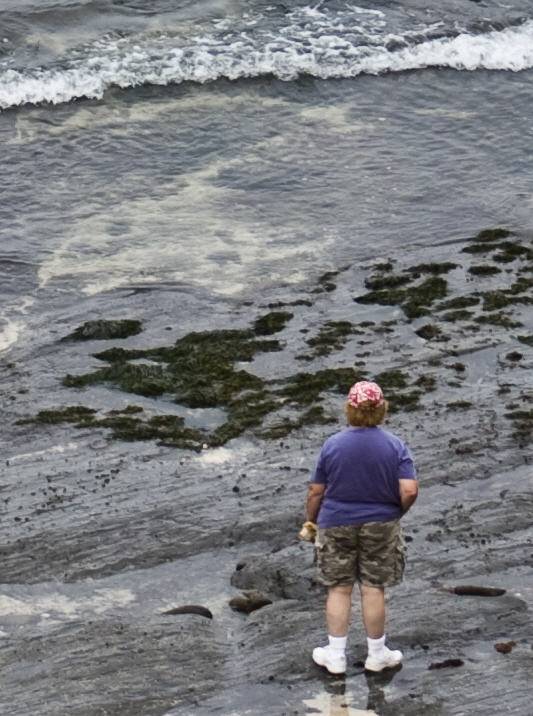
The clarity slider was introduced in Lightroom 1.1, and is also now in Camera Raw. A positive clarity value punches up an image, makes it look a little more three dimensional, by enhancing contrast along edges. The changes are concentrated in the midtones, and do little to highlights and shadows. Here is an example, a portion of an image with Clarity set to 0, and then set to 60.
60 may be a bit strong, but hopefully you see the difference. I find that almost all my images can use some clarity, at least 30. Note that it is not a substitute for sharpening, which does increase edge contrast, but along a much finer/narrower edge.
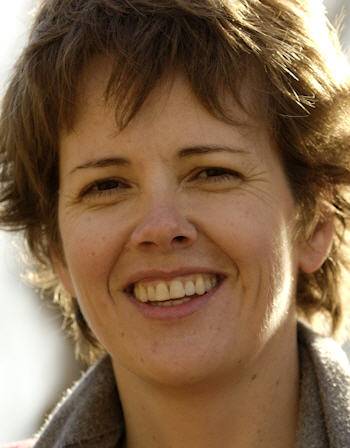
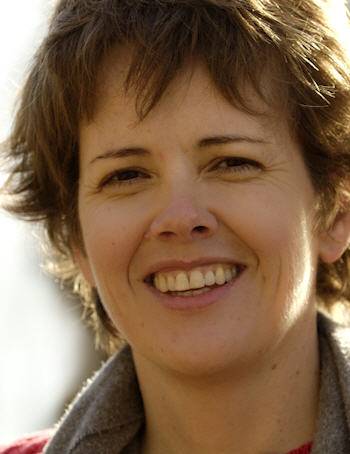
Now for the cool part: negative clarity, which as expected, decreases edge contrast. What are wrinkles, but edges?! So let’s soften some wrinkles and skin to get a little bit more of a healthy glow … my own face makes a great candidate. The first image shows no adjustment. In the second image, with the adjustment brush in LR (or CS4 Camera Raw) active, I set the Clarity slider to -100, and painted over my face, excluding the eyes and mouth.
Actually, since some of my wrinkles are deep enough to be dark shadows, clarity only improves them a little, but it does much to soften the blotchiness of my skin. If -100 was too much, I can dial it back after painting (can I ever look too young??) And it is so easy to do.
If you don’t know how to use the adjustment brush, watch my video HERE.


Thanks for this tip, Laura. As a photojournalist and sometimes teacher, I’ll keep up with your blog with interest and appreciation. I’d like to pass your link on to photo-enthusiasts I know.
Keep up the good work!
Naomi Lasdon
Thank you, Naomi!
[…] tive que aumentar o nível dos pretos, subir o contraste eu aumentar o clarity e mesmo assim não fiquei satisfeito com o resultado, mas as silhuetas até que ficaram […]
For better results on portraits simply use an adjustment brush with a negative clarity adjustment. This way you can refine its use to just the areas required. This saves softening details such as hair. To go further, a positive clarity adjustment brush can then be used on selective areas.
[…] I wrote about in my Are You Clear on Clarity blog post, clarity makes your subject look more three dimensional, by adding contrast to edges (in […]
I was pretty clear on the Lr3 clarity slider, but somewhat mystified by the adjustment in Lr4. It seems to do more than just increase local contrast. Can you tell us all what that “more” is?
Cheers,
Will
It still enhances local contrast, Will. I don’t know details behind the algorithm change though.
Thanks! Learned so much from you! “)
You’re welcome, newbie!