
 Lightroom’s Quick Develop panel in the Library module is great for making fast edits to or applying presets to one or many photos without having to go to the Develop module, and for making relative changes to a group of photos – for example, bumping up exposure on all photos by one stop. (There’s no other way to do this!). It’s also great for quickly undoing editing work on one or many photos. Watch my short video tutorial below for more on these topics, as well as for how to reveal more settings and how to troubleshoot Quick Develop issues.
This video is a five-minute lesson from my 15 1/2 hour Lightroom CC/6 and 5: The Fundamentals & Beyond video series.
(For best quality, after starting the video, click on the sprocket wheel in the bottom right and choose 720/HD.)
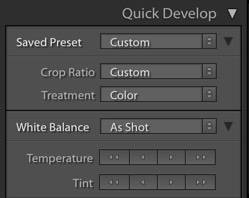
00:24 Expand the Quick Develop panel to reveal more settings
00:51 Make quick adjustments and apply presets without having to go to the Library module
01:16 Increments available
01:47 Reset one or more photos
02:07 Edit several (or several hundred!) photos at once
02:33 Example of cropping several to same crop (aspect) ratio
03:21 Making the same relative adjustment to multiple photos – there’s no other way to do this!
04:10 Why you may see changes to only one photo of those you have selected – Grid view vs. Loupe view
04:28 Offline or missing photos — Quick Develop will be deactivated / grayed out
04:43 Collapse/hide settings in panel

Thanks Laura for revealing more of LR’s hidden gems. So useful, so much fun!
Roy.
You’re welcome, Roy!
This is GREAT onfo, Laura, Thank you!! I dont know WHY I never noticed you could drop down additional selections under the “Tone Control”? DUH, just about EVERYTHING is there, LOL! I guess you just get used to seeing things and dont pay close enough attention after a while…?
Wonderful information! Because of the darkness of LR, I hadn’t even seen that there were the little arrows. This will speed up things for me so much and I SO appreciate it.