
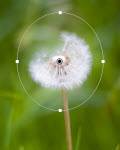
 The Radial Filter tool in Lightroom 5 (and now 6 and CC) is great for making local changes to your photo that affect either the outside or inside of an oval or circular area — a classic example is creating a vignette effect to darken the edges of your photo and to bring attention to the center. We have been able to create vignettes with the Effects panel in LR 4 and Lightroom 3, but the new Radial Filter adds the ability to (1) highlight areas that are not in the center of your photo, and (2) do much more than darkening and lightening areas. We can now affect saturation, contrast, white balance, sharpness/blur, and much more.
Watch the video below for complete instructions on how to use the Radial Filter tool. Useful shortcuts are listed after the video.
(For higher quality, after hitting Play, click on the sprocket wheel in the bottom right and choose 720/HD.)
Radial Filter tool shortcuts:
Cmd/Ctrl + double-click on the image to set the bounding ellipse to the image bounds
Shift + M: Expand Radial Filter tool
Drag: Radial Filter is scaled from center
Cmd/Ctrl + double-click: Expand Radial Filter to visible image area
Cmd/Ctrl + double-click on existing RF: Expand to visible image area
Option/Alt + Cmd/Ctrl + Drag: Duplicate Radial Filter
H: Hide Bounding Box
Apostrophe key ( ‘ ): Invert Mask
Double-click on existing Radial Filter: Apply & dismiss Radial Filter
Click here to go to lots more Lightroom 5 new feature video tutorials and articles.

Great tutorial. Never knew about the second masking feature. Found that your voice sped up when giving the directions on what keys to hit to open the second mask, resulting in my having to replay 4-5 times to understand what you said. Or it could be I’m just going deaf in my old age!
Anyway, enjoyed it very much, learned something new and signed up for your newsletter.
Just scrolled up from the comment box and see that you have all the commands posted there. Did not see them the first time as I was watching the video in full screen. Looks like you have thought of everything! Looking forward to your next one.
You’re welcome, Doug. Sorry about the voice speeed-up!
The best explanation of the radial filter tool that I’ve seen.
Great to hear, Michael.
Thank you Laura for an awesome and extremely clear tutorial.
Hey Laura,
Just saw another video on the radial filter that David Marx did. He told about a short cut that you can use with this filter to “snap” it to the edges of the photograph. I think it involved the Cmd/Ctrl key plus double-clicking. Have you heard of this and can you clarify the keystroke combo?
Thanks,
Kathy
Ctl/Cmd-Double-Click, Kathy.
Love your tutorials, so precice and clear, thank you Laura have learned a lot.
It keeps my senior brain alive and active.