The Post Crop section in the Vignettes panel of the Develop Module of Lightroom 2 (AND THE EFFECTS PANEL OF LIGHTROOM 3) allows you to add creative vignettes. It is called Post Crop, because the vignette will always adjust to any cropping you do, even if you crop after you create the vignette.
Unless you have played with all the sliders, you may not realize what kind of creative effects you can get. For example, you can simulate a film border, as in this image:

Post Crop Vignette
To get this, I slid all the post-crop sliders to the left:
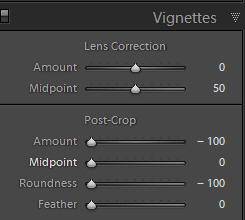
Black Film Border Settings
Amount controls the tone of the vignette, from pure black at -100 to pure white at +100. So if you want a white border, slide it all the way to the right.
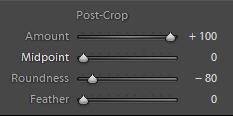
Roundness controls how thick the border is. Less negative roundness gives you thicker edges. When you go towards zero and into positive territory the shape moves from rectangular to oval and then round. I increased Roundness here from -100 to -80, and changed the Amount to +100 to make the vignette white.

Thicker White Border, Roundness at -80
For comparison, here is Roundness at +20 — now the shape is an oval:

Roundness at +20
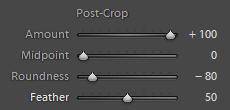
Feathering softens the border edge. Here I have gone back to my rectangular example, with Roundness at -80, and increase the feather setting from 0 to 50 :

Feather = 50 to Soften Edges (All other settings as above)
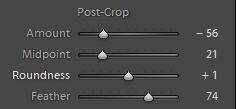
Here’s how I would create a classic soft black oval vignette:
- Slide Amount to the left to darken to your taste.
- Is the border too visible? If so, increase feathering to fade it more. If instead you want more of an obvious edge, slide feathering to the left.
- Adjust the roundness, to the left to make the vignette more rectangular, to the right to make it rounder.
- To cover more of the image with the vignette (leaving a smaller center), reduce the midpoint. To cover less, increase the midpoint.

Classic Dark Oval Vignette
The same vignette, with Amount = +85 to make it almost white:

Almost White Oval Vignette
No doubt you will find settings that you prefer to mine — I hope this post encourages you to experiment. Once you find a vignette that you like, save it as a preset so that you can use it on other images :
In the Preset panel on the left side of the Develop Module, click on the + sign to the right of the word Preset:

Type a descriptive name in the Preset Name box, click “Check None” to clear all the checkmarks, then click in the box next to Post-Crop under Vignette, so that this is the only setting from the image you have been working on that the preset remembers:
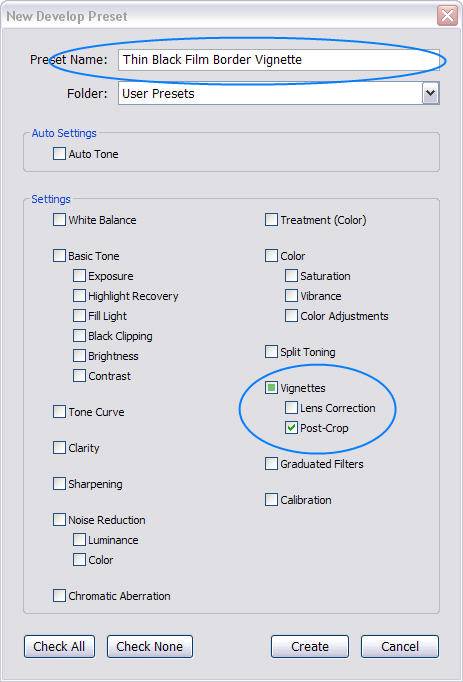
Select a new image, then in the Preset Panel under User Presets, click on your vignette preset
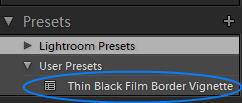
and watch Lightroom do its magic.


[…] Often I want to darken (or lighten) the edges of a photo to bring more focus to the center. If I am ok with all edges being affected evenly, I will go to the Effects panel and add a vignette. Vignettes don’t have to be so heavy-handed as to be obvious, and despite my example below, they also are not just useful with portraits. (Here’s a post with more on vignettes.) […]
[…] The other reason to use Post-Crop Vignetting for creative vignetting is that you can do more with it. You can come in further towards the center of the photo, darken and lighten more, feather more or less, and change the shape from rectangular to round. Here is a post on achieving creative effects, like film borders, with post-crop vignetting. […]
[…] Shoe’s site. She also wrote an article that goes into framing tricks using the vignette tool. Click here to read her excellent […]